James Maher is a New York Photographer, a huge Knicks fan, and a lifelong New Yorker who got his driver’s license at 30 years old — as any true Manhattanite should. Maher never took the conventional route. His love of photography started with using Photoshop to make fake driver license IDs at the University of Madison with his college roommates.
Today his business offers a mix of products and services — including photography print sales, a portrait business, conducting workshops, creating online content, and authoring three books.
Early on James knew the key to growing his business was online. And a big part of his online marketing strategy is to create personal relationships through email. But in order to do so, he needed a way to get email addresses.
Four steps James took to grow his online business
Step 1: Drive traffic to a website
There are three channels James uses to drive traffic to his website – search engine optimization, guest posting on other websites, and Facebook ads.
Search Engine Optimization (SEO)
“Email and SEO together are the two backbones of my business. It is a vital way to reach my fans. I don’t think I could have as diverse of a business without it,” he explains.
To rank high in Google, James writes very relevant and useful articles on specific topics his audience may be interested in.
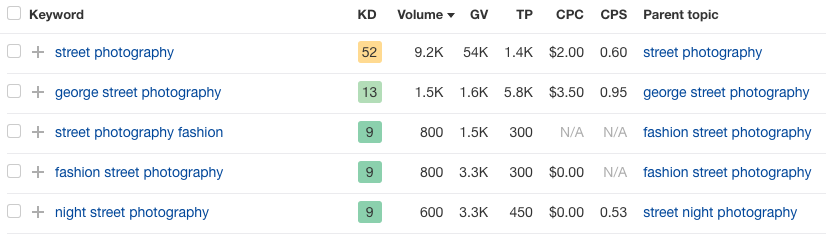
For example, the monthly volume for people searching for “street photography” is 9,200.
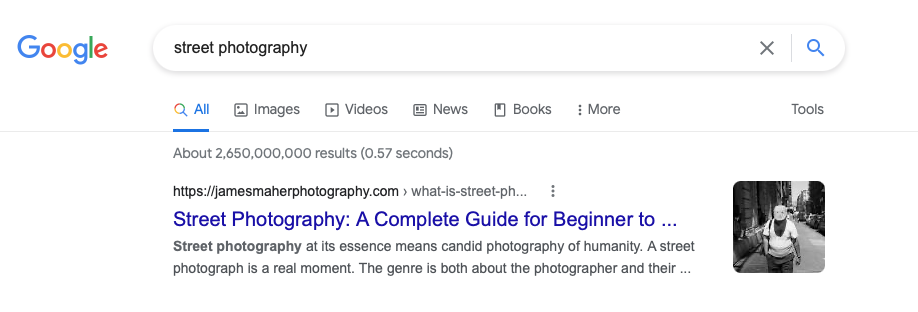
James wrote an article about this topic and now his post ranks number one.
Guest Posts
James writes guest blogs on other photography websites that link back to his website. Building “inbound” links helps his site rank better in the search engine results, which in turn drives more traffic to his site.
Facebook Ads
Maher also uses Facebook ads to target local photographers in the Northeast. They see the ad, download the photography travel guide, and are added to his email list.
Step 2: Sign up forms in the right places
No matter where you visit on James’ website, there is a sign-up form.
He uses different sign-up forms on different pages of his website so he can offer targeted content suited to his different readers’ interests.
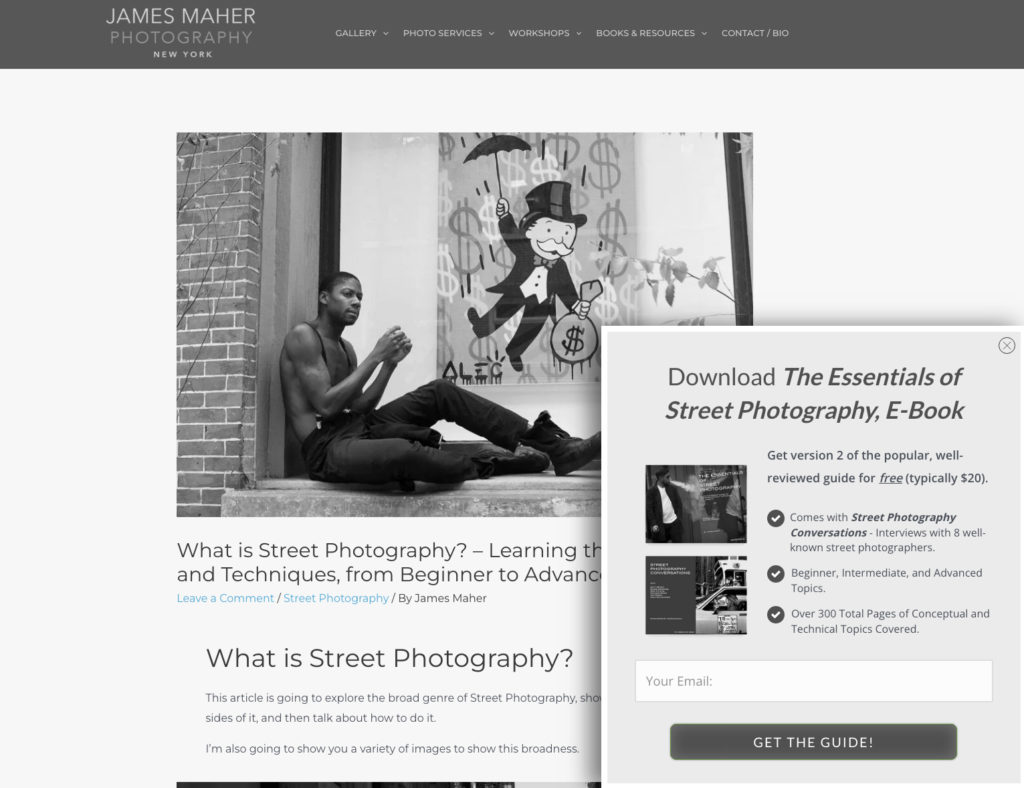
To make sure you don’t miss an opportunity to sign up for his email list, James has added a form at the bottom of every page. Plus, as you’re reading any of his articles or viewing his amazing photography, a pop-up form will appear asking you to download a lead magnet (aka a “freebie” or a “giveaway”). His lead magnet is a piece of extra-valuable content. His website visitors have to give their email address in order to access that content.
James created each of these forms in his AWeber account (see below for how he did this). By creating his forms in AWeber, anyone who gives him their email address is automatically added to his email list in his AWeber account. This allows James to use one tool to collect and send emails, saving him both time and money.
The key to actually getting those website visitors to sign up for his email list is to offer a lead magnet relevant to their “search intent” (to what they were looking for when they first came across his site).
For example, remember the search example we mentioned above — “street photography.” When people visit that page, which is the first search result, a pop-up form shows an offer to download “The Essentials of Street Photography eBook.” People who are interested in street photography will naturally be interested in this ebook.
Step 4: Use email automation to nurture new sign ups
Depending on the content users download, Maher sends more in-depth information in an automated email series, which allows him to share information and tips, build relationships with new subscribers, and promote paid products.
This automated email sequence is triggered from his AWeber account. Once the campaign is set up, no extra work is required.
See below for how James set up his automated email series in AWeber.
How to set up a sign-up form in AWeber
To grow his email list, James followed these steps:
Step 1: Set up your sign-up form
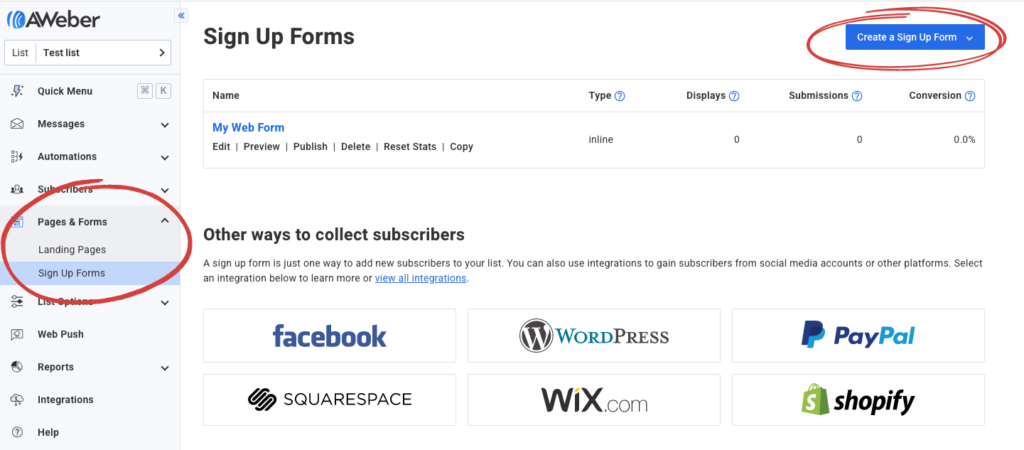
1 – In the “Pages & Forms” drop-down menu, select “Sign-Up Forms.” Then click “Create a Sign-Up Form.”
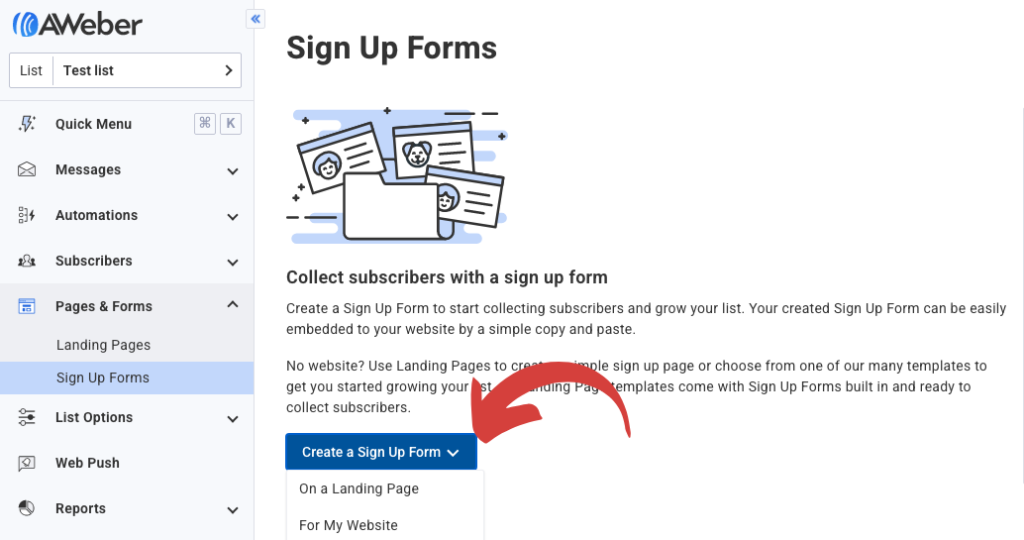
2 – In the drop-down menu choose whether you’ll be adding this sign-up form to your website or to a landing page.
Step 2: Design your sign-up form
Here’s how you can change the your sign-up form design in AWeber.
Step 3: Add your form to your website or landing page
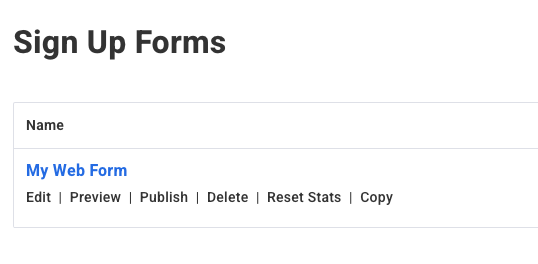
1 – In the “Pages & Forms” drop-down menu, select “Sign-Up Forms.” Then click “Publish.”
2 – You can either install the HTML code on your website or use the form as a landing page.
To install the form on your website, copy and paste the Javascript Snippet or Raw HTML version anywhere between the <body> tags of your site.
How to set up an automated email campaign in AWeber
To create his series of four emails, James followed these steps using AWeber:
Step 1: Set up your automated campaign
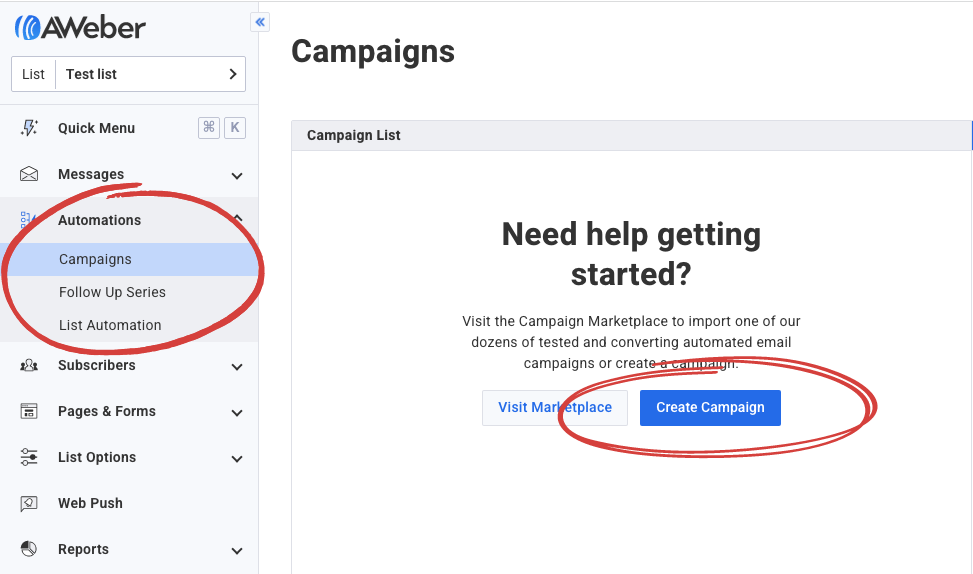
1 – Select “Automations” from the left drop-down navigation, then “Campaign,” then “Create a Campaign.”
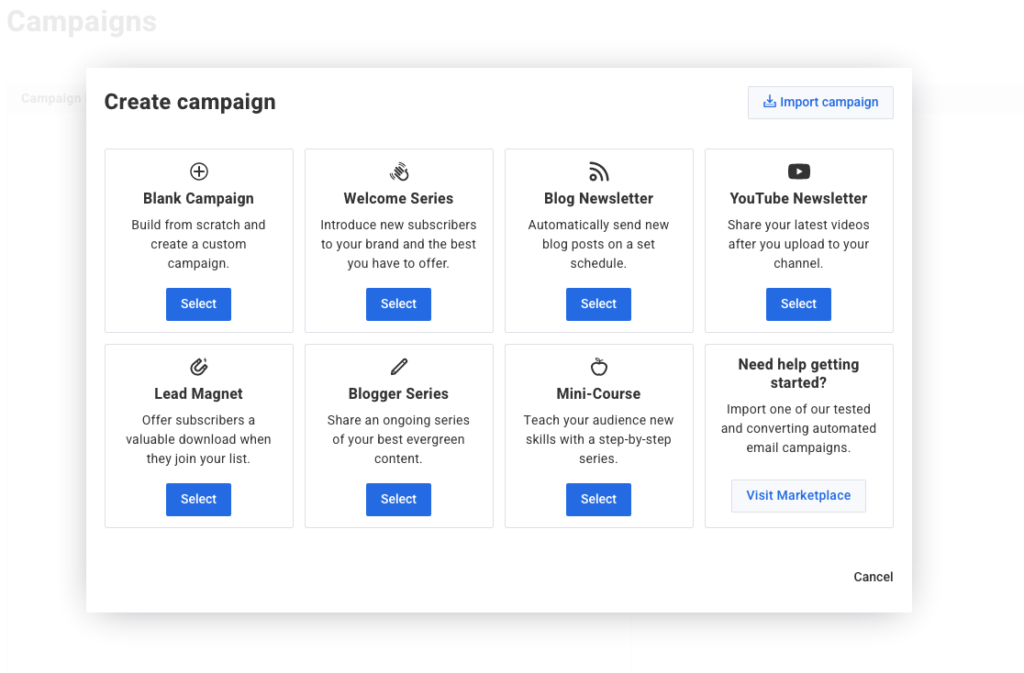
2 – You can start with a pre-built automated campaign or build from scratch using the drag and drop campaign builder.
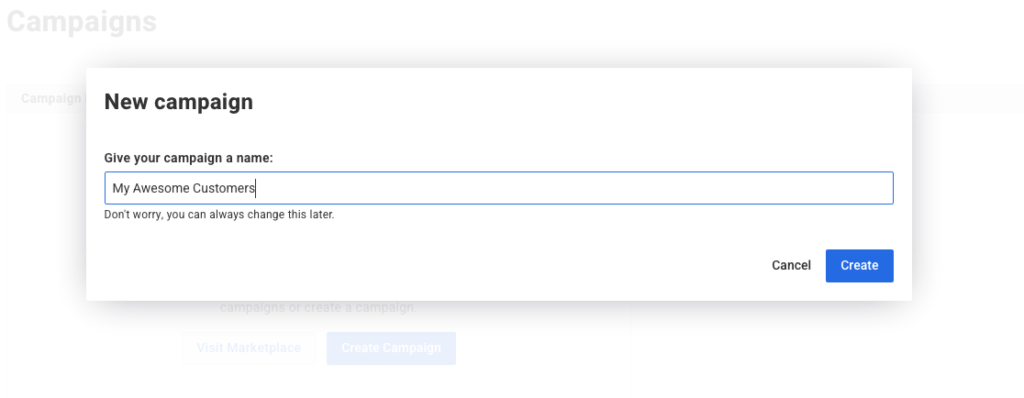
3 – Name your campaign.
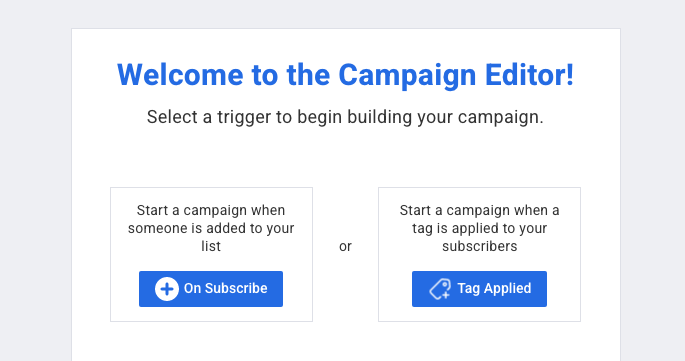
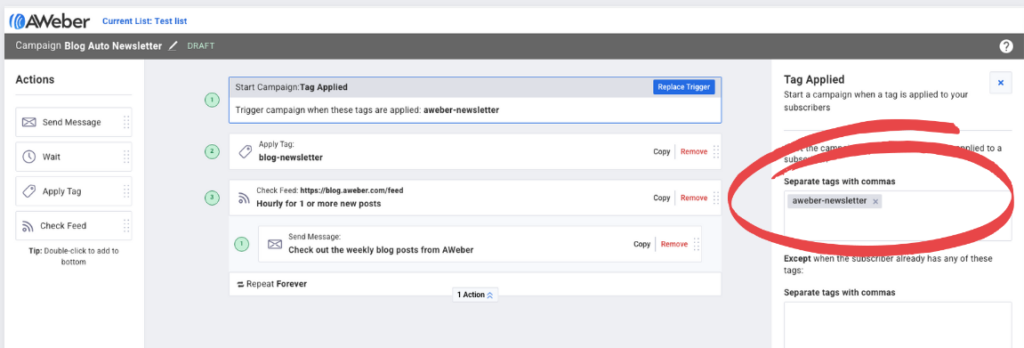
Step 2: Select a trigger to start the email campaign
1 – Your campaign can start either when someone is added to your list or based on a specific action using tags.
2 – If applying a tag, apply which tags will start your campaign.
Step 3: Start building your campaign
1 – Using the drag and drop editor to select the email messages and timing between emails.
2 – To create emails, pull in the “Send Message” icon and select a current email or create a new one.
Step 4: Start the campaign
1 – “Save & Exit” the campaign builder
2 – In the Draft drop-down menu, select Activate Campaign
Want to grow your email list like James?
Then get started for free with AWeber. You’ll have access to all the tools James used to capture email addresses and send automated emails.
AWeber can provide you with all the tools and support you need to grow your business or your side hustle.
James Maher is a New York Photographer, a huge Knicks fan, and a lifelong New Yorker who got his driver’s license at 30 years old — as any true Manhattanite should. Maher never took the conventional route. His love of photography started with using Photoshop to make fake driver license IDs at the University of Madison with his college roommates.
Today his business offers a mix of products and services — including photography print sales, a portrait business, conducting workshops, creating online content, and authoring three books.
Early on James knew the key to growing his business was online. And a big part of his online marketing strategy is to create personal relationships through email. But in order to do so, he needed a way to get email addresses.
Four steps James took to grow his online business
Step 1: Drive traffic to a website
There are three channels James uses to drive traffic to his website – search engine optimization, guest posting on other websites, and Facebook ads.
Search Engine Optimization (SEO)
“Email and SEO together are the two backbones of my business. It is a vital way to reach my fans. I don’t think I could have as diverse of a business without it,” he explains.
To rank high in Google, James writes very relevant and useful articles on specific topics his audience may be interested in.
For example, the monthly volume for people searching for “street photography” is 9,200.
James wrote an article about this topic and now his post ranks number one.
Guest Posts
James writes guest blogs on other photography websites that link back to his website. Building “inbound” links helps his site rank better in the search engine results, which in turn drives more traffic to his site.
Facebook Ads
Maher also uses Facebook ads to target local photographers in the Northeast. They see the ad, download the photography travel guide, and are added to his email list.
Step 2: Sign up forms in the right places
No matter where you visit on James’ website, there is a sign-up form.
He uses different sign-up forms on different pages of his website so he can offer targeted content suited to his different readers’ interests.
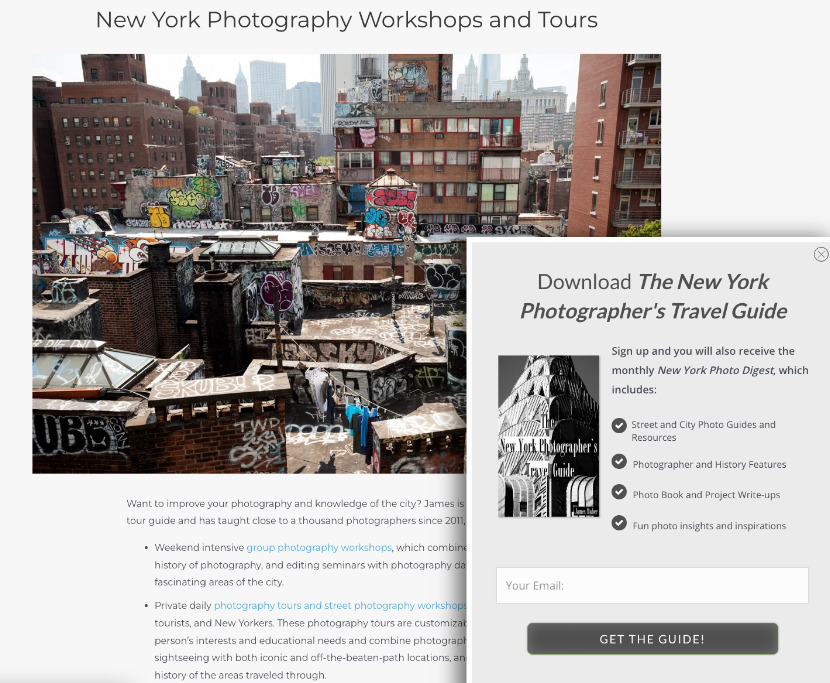
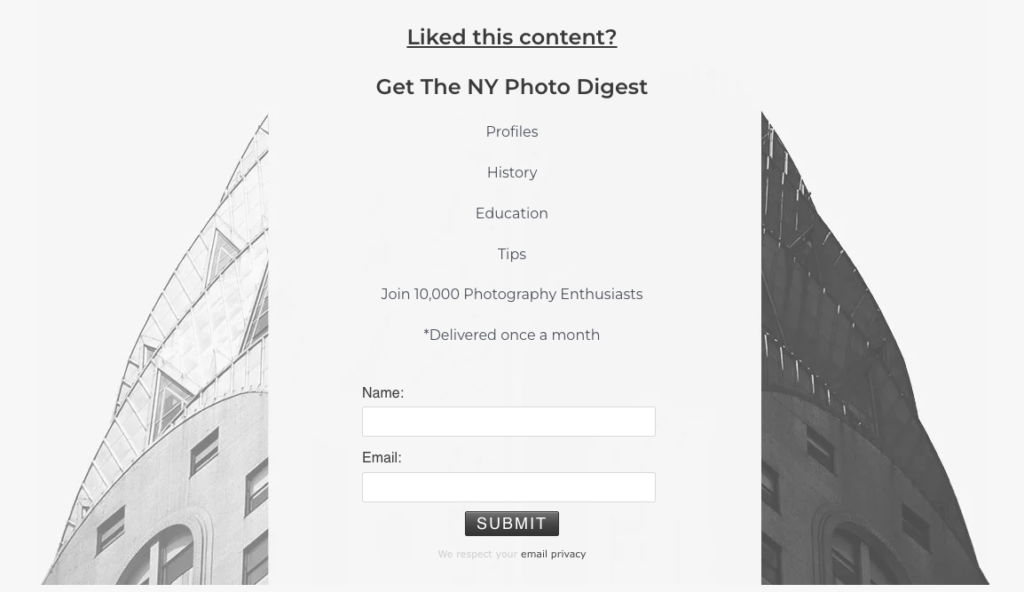
To make sure you don’t miss an opportunity to sign up for his email list, James has added a form at the bottom of every page. Plus, as you’re reading any of his articles or viewing his amazing photography, a pop-up form will appear asking you to download a lead magnet (aka a “freebie” or a “giveaway”). His lead magnet is a piece of extra-valuable content. His website visitors have to give their email address in order to access that content.
James created each of these forms in his AWeber account (see below for how he did this). By creating his forms in AWeber, anyone who gives him their email address is automatically added to his email list in his AWeber account. This allows James to use one tool to collect and send emails, saving him both time and money.
Related: 16 Proven sign up form ideas to grow your email list
Pop up form
Inline form at the bottom of each page
Step 3: Offer a relevant gift (or lead magnet)
The key to actually getting those website visitors to sign up for his email list is to offer a lead magnet relevant to their “search intent” (to what they were looking for when they first came across his site).
For example, remember the search example we mentioned above — “street photography.” When people visit that page, which is the first search result, a pop-up form shows an offer to download “The Essentials of Street Photography eBook.” People who are interested in street photography will naturally be interested in this ebook.
Related: How to Create a Lead Magnet in Less Than a Day (That Actually Works)
Step 4: Use email automation to nurture new sign ups
Depending on the content users download, Maher sends more in-depth information in an automated email series, which allows him to share information and tips, build relationships with new subscribers, and promote paid products.
This automated email sequence is triggered from his AWeber account. Once the campaign is set up, no extra work is required.
See below for how James set up his automated email series in AWeber.
How to set up a sign-up form in AWeber
To grow his email list, James followed these steps:
Step 1: Set up your sign-up form
1 – In the “Pages & Forms” drop-down menu, select “Sign-Up Forms.” Then click “Create a Sign-Up Form.”
2 – In the drop-down menu choose whether you’ll be adding this sign-up form to your website or to a landing page.
Step 2: Design your sign-up form
Here’s how you can change the your sign-up form design in AWeber.
Step 3: Add your form to your website or landing page
1 – In the “Pages & Forms” drop-down menu, select “Sign-Up Forms.” Then click “Publish.”
2 – You can either install the HTML code on your website or use the form as a landing page.
To install the form on your website, copy and paste the Javascript Snippet or Raw HTML version anywhere between the <body> tags of your site.
How to set up an automated email campaign in AWeber
To create his series of four emails, James followed these steps using AWeber:
Step 1: Set up your automated campaign
1 – Select “Automations” from the left drop-down navigation, then “Campaign,” then “Create a Campaign.”
2 – You can start with a pre-built automated campaign or build from scratch using the drag and drop campaign builder.
3 – Name your campaign.
Step 2: Select a trigger to start the email campaign
1 – Your campaign can start either when someone is added to your list or based on a specific action using tags.
2 – If applying a tag, apply which tags will start your campaign.
Step 3: Start building your campaign
1 – Using the drag and drop editor to select the email messages and timing between emails.
2 – To create emails, pull in the “Send Message” icon and select a current email or create a new one.
Step 4: Start the campaign
1 – “Save & Exit” the campaign builder
2 – In the Draft drop-down menu, select Activate Campaign
Want to grow your email list like James?
Then get started for free with AWeber. You’ll have access to all the tools James used to capture email addresses and send automated emails.
AWeber can provide you with all the tools and support you need to grow your business or your side hustle.
Get started now.
Keep reading:How to create a lead magnet in less than a day (that actually works)How Joy Dakinisun Launched Her New Website with Email Marketing Ready from Day One
 87% off ends soon!