Build and Monetize Your Community with Newsletter Hub
Kelsey Johnson
We’re excited to announce Newsletter Hub, a curated collection of your broadcast emails, included in your AWeber account.
Your AWeber Newsletter Hub is basically an online list of all the emails you’ve ever written that you want to show off — like a blog page. You can pick-and-choose any broadcast email you want to include, and you can even charge people to see it (if you want to)!
Want to grow your subscribers? Build a community? Monetize your content? You can do all this and more with your Newsletter Hub. It’s included in your account — to unlock the growth potential, you simply need to start using it.
Note: Newsletter Hub is an improved version of the previously-named Broadcast Archive.
What does the Newsletter Hub look like?
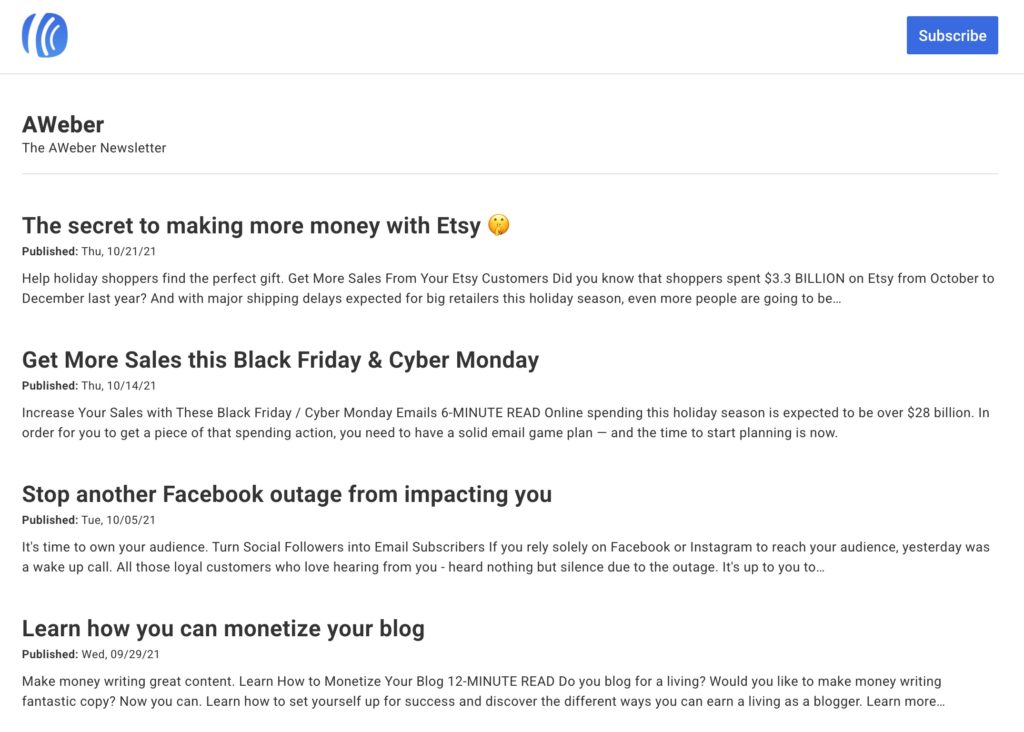
It’s quite simple: Your Newsletter Hub is an index — or list — of all the broadcast emails you’ve sent recently, in order of the time they were sent.
Here’s the Newsletter Hub for The AWeber Newsletter, our weekly tips and tricks email, updating everyone on the new posts from our blog:
This page includes:
A custom logo
The name of your company and your newsletter’s name
The titles, dates, and previews of all your included broadcast emails
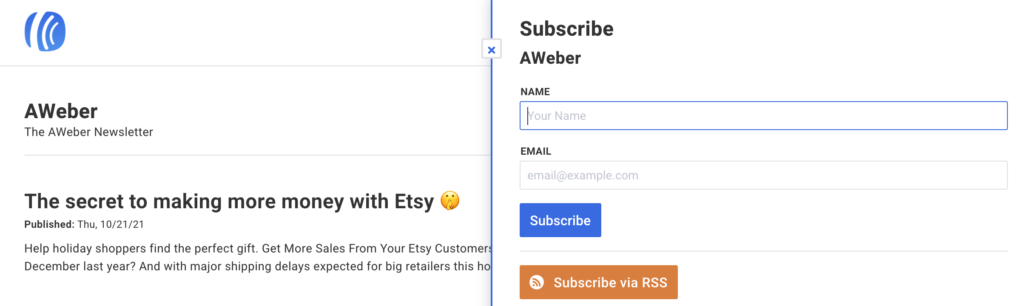
AND a subscribe button…
Click “Subscribe” and a sign up form will slide out from the left side of the screen. From there, anyone can subscribe to your emails. That’s right, you can promote sign ups directly from your Newsletter Hub page!
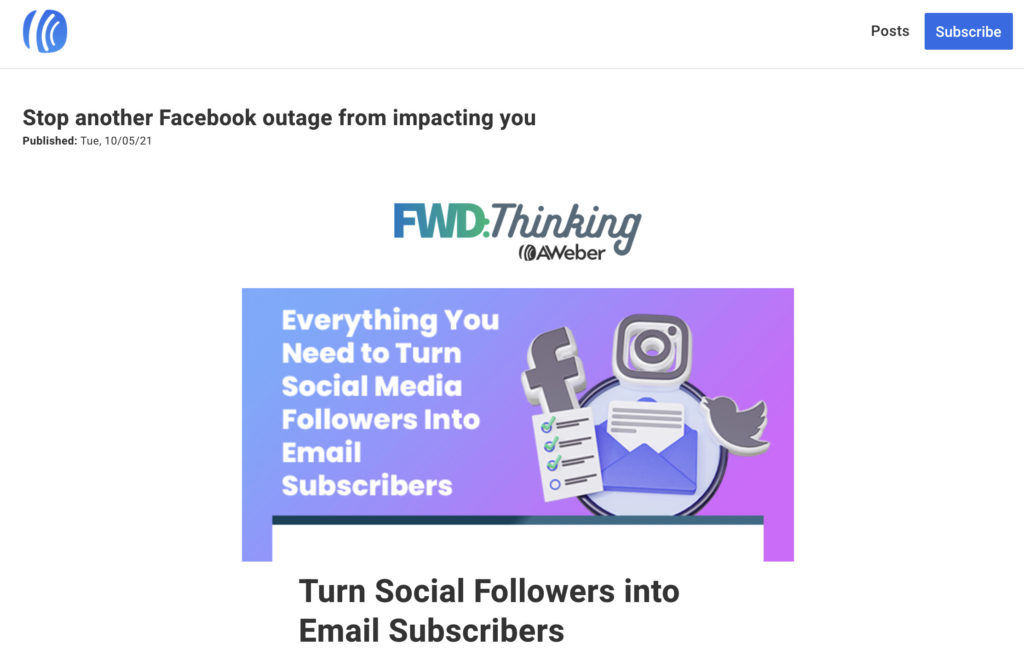
Here’s what an individual Newsletter Hub page will look like when you click on the headline:
First of all, your Newsletter Hub “just exists.” You can go into your AWeber account right now and find it.
The power is in promoting it, and using it to properly increase exposure of your newsletter. That’s how you’ll grow your audience. Here are a few tips to get started.
Promote your newsletter using your newsletter
Have you ever been asked to sign up for an email list, but you don’t know what you’ll be getting? You have to trust your only source — a short description on the signup form.
Your newsletter’s value can’t be contained in a few words. And you could be losing potential subscribers because your sign up form isn’t selling it.
Do you know what would sell it? If they could see your previous emails — to know exactly what they’re getting.
For example, take a look at this Newsletter Hub from The Busy Traveler (a travel guide for real people).
You can see in a glance what you’ll get from this newsletter:
General advice on what to bring when traveling
Specific to-do lists for certain cities (Chicago, San Diego…)
Advice on how to travel better from an expert (can you really skip the lines?)
Any person who travels, even infrequently, may want to at least bookmark this page for future reference. They’d probably subscribe, too. That way, they’d get notified of new travel expertise in their inbox.
Make your newsletter more shareable
Your Newsletter Hub is available online, like a blog. Sharing it is as simple as dropping a link into a social media post, text message, or even another email.
What does that mean for your growth?
For example, let’s say your newsletter includes advice for small business owners, and you previously sent an email talking about tax write-offs. One of your subscribers read it and got a ton of useful information.
Months later, your subscriber was talking to a friend who asked them in passing for advice on tax write-offs for their new business venture. Your subscriber, who remembers the post, can go to your Newsletter Hub, find the tax write-off post, and text it to their friend immediately. That friend may even subscribe, too!
Word-of-mouth is one of the best ways to grow your audience. People are inclined to trust their friends’ recommendations. And Newsletter Hub makes sharing super easy, so there’s no recommendation friction.
Turn social media followers into subscribers
Chances are, you have social followers who don’t subscribe to your emails. And that’s a problem. In order to maximize the amount of money you can make from your audience (whether by sales, subscriptions, or any other monetization tactic) you need to reach them via social media and email.
Here’s why: Your social media posts are subject to another company’s algorithm. Companies like Facebook, Instagram, Twitter, and TikTok actually profit by only sending a percentage of your posts to the people who follow you. That way, they can charge you for a bigger reach.
So start asking your social followers to sign up for your newsletter! And now, you don’t have to ask them to trust you — they can check out your previous emails on your Newsletter Hub. Simply drop your Hub’s link into your bio or on regular posts (if the platform allows it).
Let your followers know they can get ALL of your content — and never miss news, updates, or a sale — when they subscribe to your newsletter.
Now that you’ve got your subscriber growth strategy in place, it’s time to monetize your content!
How can I make money with Newsletter Hub?
The basic way to make money from your content is with a premium subscription model. The main thing you need to do in order to monetize your newsletter is to split your audience.
You’ll need at least two tiers, separated into two lists (note that you’ll need an AWeber Plus account to have access to multiple lists):
Free subscribers — this is how you earn trust and get people interested in your brand
Paid subscribers — these are your superfans, willing to pay for more in-depth content from you
Next, you need to determine which content you create goes to each audience. If you’re not sure where to start, here are a couple of ideas for splitting your content:
Short summaries for free; deeper research and findings at a cost
“What it is” for free; “How it works” at a cost
Your solo musings for free; interviews with well-known experts at a cost
Blog posts for free; guides and checklists at a cost
Inspired to get started? Great! Read on to learn how you can charge for and deliver your free and premium content, all inside of AWeber.
Make sure you create this landing page in the “premium subscribers” list.
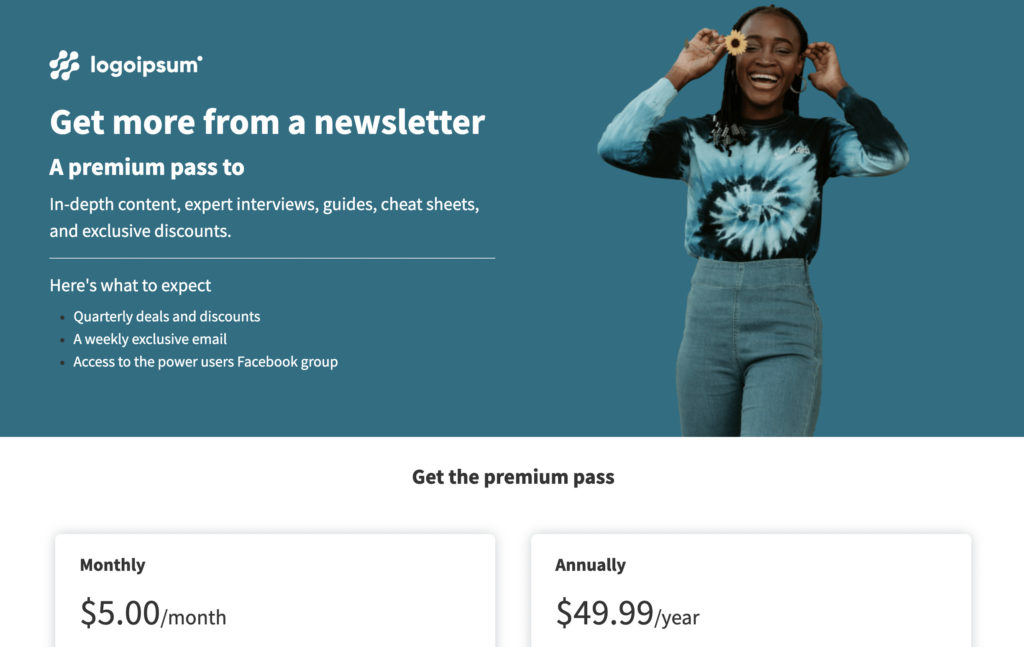
All you need on the page is a simple description of what a premium subscription includes, what content your audience will be paying for, how much it costs, and a payment button.
3. After payment, offer premium content
After someone pays for the subscription, you can redirect them to a new page. Either send them to a “Thank You” landing page or just direct them to the Newsletter Hub for your premium content list. Either way, the subscriber immediately gets a lot of value from the subscription!
Don’t forget that the person will also be added to your premium subscriber email list, so they’ll receive every uber-valuable newsletter you send out after that point.
Here’s how to set up a redirect after a purchase:
4. Link to your Newsletter Hub in every newsletter
Make sure your subscribers, both free and premium, always have a link to your Hub. I recommend linking it to something that says “View online” or “Read all previous posts.”
Chances are anyone who’s seeing one newsletter will want all newsletters at their fingertips — especially if they’re paying for the content. We are in a binge culture, after all.
5. Sit back and profit from your content
You work hard to create useful content. You deserve to be paid for it. With Newsletter Hub, you won’t always be in a state of creating the next “best newsletter.” But you can still profit from the evergreen content you’ve already written.
How can I find my Newsletter Hub?
Alright, now that we’ve got plans for our Newsletter Hub, it’s time to grab the link.
There are three places you can find a link to your Newsletter Hub in your account.
1. When scheduling a broadcast email
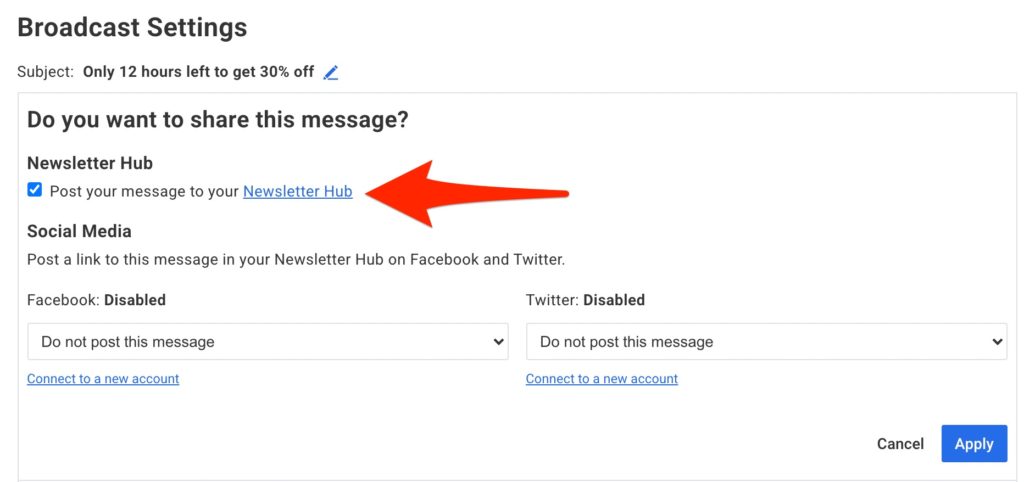
You’ll see a link to it any time you schedule a broadcast email. Under message drafts click “Schedule” and then “Edit” next to “Do you want to share this message?”
Make sure your Newsletter Hub is enabled, then you’ll see a link directly to the Hub.
2. Under List Settings
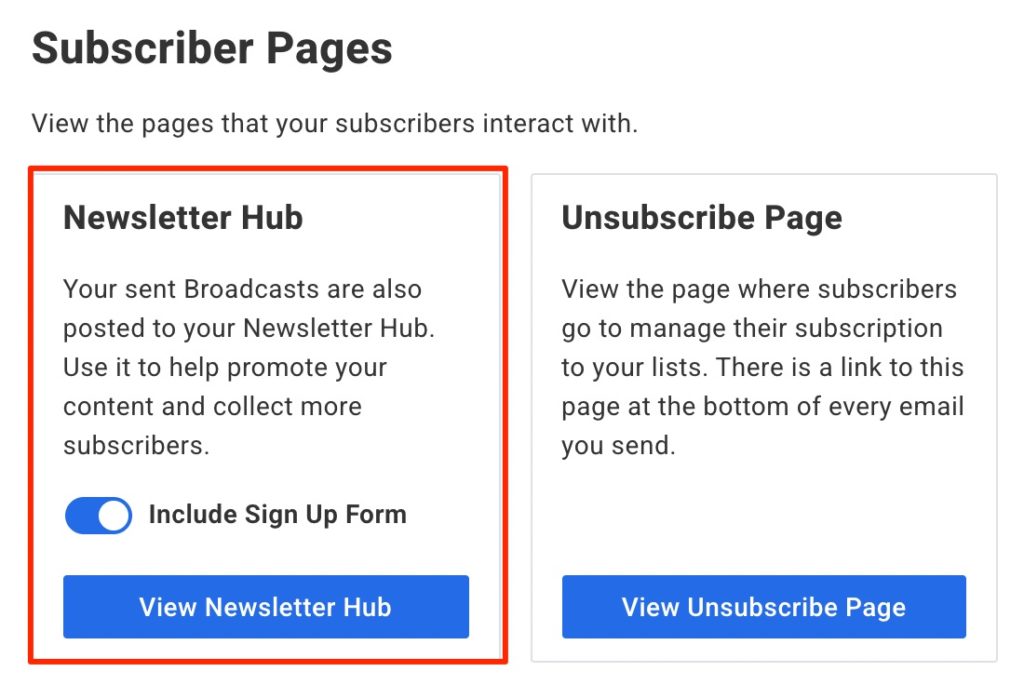
Click on “List Options” -> “List Settings” -> “Personalize Your List” and you’ll see your Newsletter Hub link under Subscriber Pages.
Note that you can also choose whether or not to allow sign ups on your Newsletter Hub page.
3. Under sent broadcast emails
Click on any previously-sent broadcast email where you can access stats on the email. As long as Newsletter Hub is enabled, the link will show at the bottom.
How do I choose which emails are included?
You can opt to have your broadcast added to the Newsletter Hub when you send it, under Settings -> Do you want to share this message?
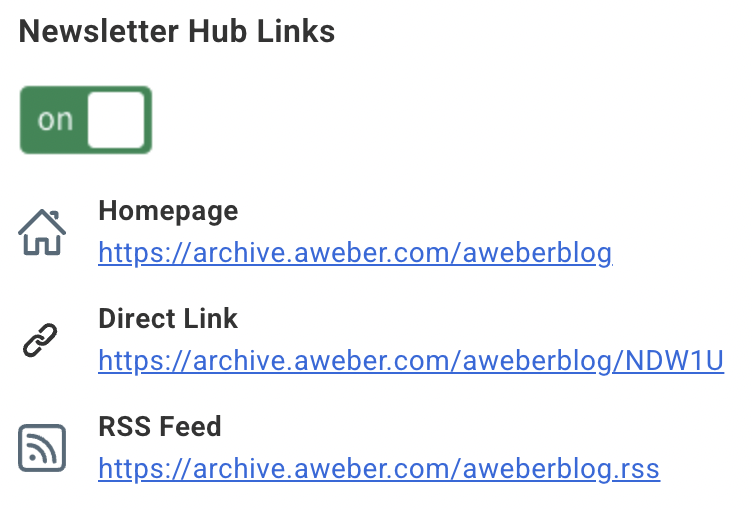
Any time after it’s sent, you can also click on the sent broadcast and toggle on/off under Newsletter Hub Links to include or not include the email in your Newsletter Hub.
There are a few reasons why you might not want to include certain emails in your Newsletter Hub feed.
You offered a temporary sale. You wouldn’t want people in December seeing a sale or promotion you ran in September — they might get confused or ask for the same promotion when it’s not running.
Your email is about a product or service update. If the information is not useful long term — like a day-of notification of something — no need to include it in your Newsletter Hub where it may be seen weeks or months later.
You sent out news that’s no longer true. A Newsletter Hub, like a blog, should tell the truth when someone is reading it. If your email includes dated news, you may want to keep it out of the Hub.
And here are three types of emails you should definitely include in your Newsletter Hub!
Your regular newsletter. If this is the content your subscribers should expect from you on a regular basis, make sure they can see it
Product or service descriptions. Especially if they link to sales pages, a product sales email allows you to show off what you sell long term — not just in one email sent to your current subscribers.
Event notifications. This may seem weird, but if you host, sponsor, or attend an event, you should include it, even though it’s dated. It shows that you are publicly available, and your readers may watch for you at the next event.
Take a look at your Newsletter Hub now, and think about what your subscribers — current and future — would want to see long term. And what you’d want them to see. You can fully curate your Newsletter Hub for your needs, and your audience.
What’s coming next?
This is only the beginning of our plans for the Newsletter Hub! We have a lot of thoughts about what to include, but we’d like your take.
Want to see images? Like buttons? Comment sections? Something else? Let us know by filling out the feedback form below.
Start an AWeber account today
Want your very own Newsletter Hub? You can have one for free when you sign up for an AWeber account today. Don’t forget — you need to send out a message to have it show up in your Hub.
We’re excited to announce Newsletter Hub, a curated collection of your broadcast emails, included in your AWeber account.
Your AWeber Newsletter Hub is basically an online list of all the emails you’ve ever written that you want to show off — like a blog page. You can pick-and-choose any broadcast email you want to include, and you can even charge people to see it (if you want to)!
Want to grow your subscribers? Build a community? Monetize your content? You can do all this and more with your Newsletter Hub. It’s included in your account — to unlock the growth potential, you simply need to start using it.
Note: Newsletter Hub is an improved version of the previously-named Broadcast Archive.
What does the Newsletter Hub look like?
It’s quite simple: Your Newsletter Hub is an index — or list — of all the broadcast emails you’ve sent recently, in order of the time they were sent.
Here’s the Newsletter Hub for The AWeber Newsletter, our weekly tips and tricks email, updating everyone on the new posts from our blog:
This page includes:
A custom logo
The name of your company and your newsletter’s name
The titles, dates, and previews of all your included broadcast emails
AND a subscribe button…
Click “Subscribe” and a sign up form will slide out from the left side of the screen. From there, anyone can subscribe to your emails. That’s right, you can promote sign ups directly from your Newsletter Hub page!
Here’s what an individual Newsletter Hub page will look like when you click on the headline:
Want to check it out? See our previous posts and sign up for The AWeber Newsletter today.
How to grow your audience with Newsletter Hub
First of all, your Newsletter Hub “just exists.” You can go into your AWeber account right now and find it.
The power is in promoting it, and using it to properly increase exposure of your newsletter. That’s how you’ll grow your audience. Here are a few tips to get started.
Promote your newsletter using your newsletter
Have you ever been asked to sign up for an email list, but you don’t know what you’ll be getting? You have to trust your only source — a short description on the signup form.
Your newsletter’s value can’t be contained in a few words. And you could be losing potential subscribers because your sign up form isn’t selling it.
Do you know what would sell it? If they could see your previous emails — to know exactly what they’re getting.
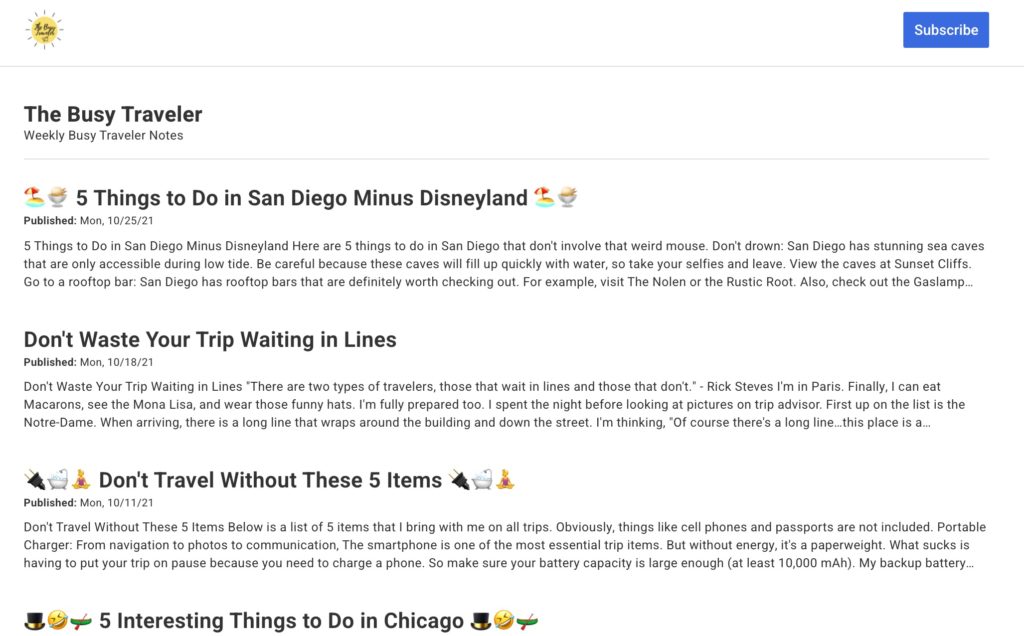
For example, take a look at this Newsletter Hub from The Busy Traveler (a travel guide for real people).
You can see in a glance what you’ll get from this newsletter:
General advice on what to bring when traveling
Specific to-do lists for certain cities (Chicago, San Diego…)
Advice on how to travel better from an expert (can you really skip the lines?)
Any person who travels, even infrequently, may want to at least bookmark this page for future reference. They’d probably subscribe, too. That way, they’d get notified of new travel expertise in their inbox.
Make your newsletter more shareable
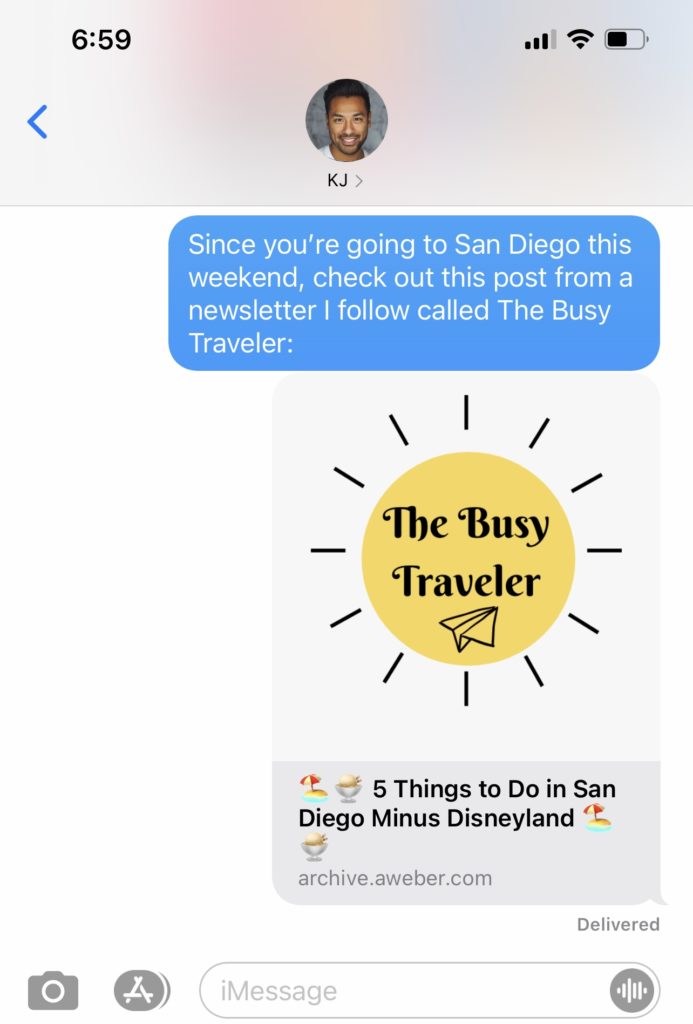
Your Newsletter Hub is available online, like a blog. Sharing it is as simple as dropping a link into a social media post, text message, or even another email.
What does that mean for your growth?
For example, let’s say your newsletter includes advice for small business owners, and you previously sent an email talking about tax write-offs. One of your subscribers read it and got a ton of useful information.
Months later, your subscriber was talking to a friend who asked them in passing for advice on tax write-offs for their new business venture. Your subscriber, who remembers the post, can go to your Newsletter Hub, find the tax write-off post, and text it to their friend immediately. That friend may even subscribe, too!
Word-of-mouth is one of the best ways to grow your audience. People are inclined to trust their friends’ recommendations. And Newsletter Hub makes sharing super easy, so there’s no recommendation friction.
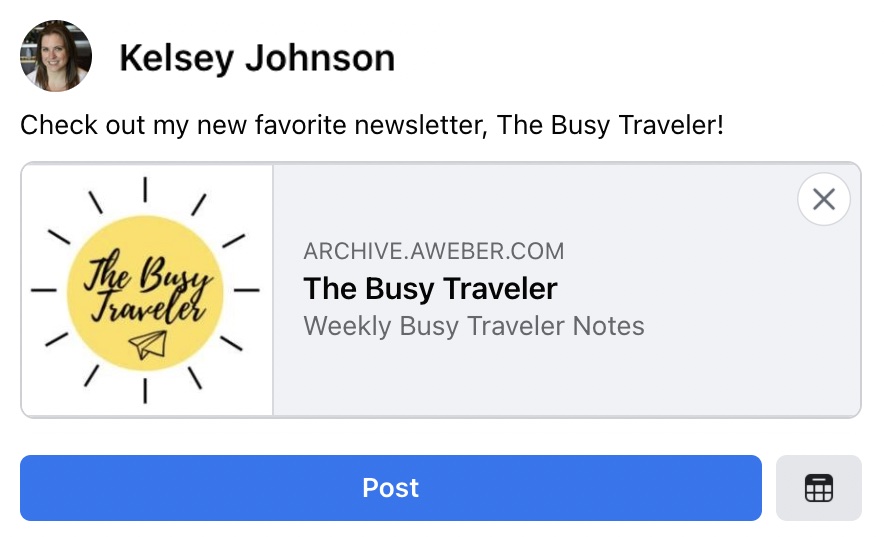
Turn social media followers into subscribers
Chances are, you have social followers who don’t subscribe to your emails. And that’s a problem. In order to maximize the amount of money you can make from your audience (whether by sales, subscriptions, or any other monetization tactic) you need to reach them via social media and email.
Here’s why: Your social media posts are subject to another company’s algorithm. Companies like Facebook, Instagram, Twitter, and TikTok actually profit by only sending a percentage of your posts to the people who follow you. That way, they can charge you for a bigger reach.
So start asking your social followers to sign up for your newsletter! And now, you don’t have to ask them to trust you — they can check out your previous emails on your Newsletter Hub. Simply drop your Hub’s link into your bio or on regular posts (if the platform allows it).
Let your followers know they can get ALL of your content — and never miss news, updates, or a sale — when they subscribe to your newsletter.
Now that you’ve got your subscriber growth strategy in place, it’s time to monetize your content!
How can I make money with Newsletter Hub?
The basic way to make money from your content is with a premium subscription model. The main thing you need to do in order to monetize your newsletter is to split your audience.
You’ll need at least two tiers, separated into two lists (note that you’ll need an AWeber Plus account to have access to multiple lists):
Free subscribers — this is how you earn trust and get people interested in your brand
Paid subscribers — these are your superfans, willing to pay for more in-depth content from you
Next, you need to determine which content you create goes to each audience. If you’re not sure where to start, here are a couple of ideas for splitting your content:
Short summaries for free; deeper research and findings at a cost
“What it is” for free; “How it works” at a cost
Your solo musings for free; interviews with well-known experts at a cost
Blog posts for free; guides and checklists at a cost
Inspired to get started? Great! Read on to learn how you can charge for and deliver your free and premium content, all inside of AWeber.
Related: Grow Your Income with Subscriptions & Payment Plans
1. Create 2 lists for your audience
Inside of your AWeber account, you’ll need to start two lists. Make sure you name each one clearly and configure your opt-in settings appropriately.
Keep all of your current subscribers in the “Free” list, and start a new list for premium subscribers.
2. Set up a landing page to charge for subscriptions
Did you know that you can charge for subscriptions directly in AWeber (using our Stripe integration)? Set up a landing page from scratch or use one of our templates.
Make sure you create this landing page in the “premium subscribers” list.
All you need on the page is a simple description of what a premium subscription includes, what content your audience will be paying for, how much it costs, and a payment button.
3. After payment, offer premium content
After someone pays for the subscription, you can redirect them to a new page. Either send them to a “Thank You” landing page or just direct them to the Newsletter Hub for your premium content list. Either way, the subscriber immediately gets a lot of value from the subscription!
Don’t forget that the person will also be added to your premium subscriber email list, so they’ll receive every uber-valuable newsletter you send out after that point.
Here’s how to set up a redirect after a purchase:
4. Link to your Newsletter Hub in every newsletter
Make sure your subscribers, both free and premium, always have a link to your Hub. I recommend linking it to something that says “View online” or “Read all previous posts.”
Chances are anyone who’s seeing one newsletter will want all newsletters at their fingertips — especially if they’re paying for the content. We are in a binge culture, after all.
5. Sit back and profit from your content
You work hard to create useful content. You deserve to be paid for it. With Newsletter Hub, you won’t always be in a state of creating the next “best newsletter.” But you can still profit from the evergreen content you’ve already written.
How can I find my Newsletter Hub?
Alright, now that we’ve got plans for our Newsletter Hub, it’s time to grab the link.
There are three places you can find a link to your Newsletter Hub in your account.
1. When scheduling a broadcast email
You’ll see a link to it any time you schedule a broadcast email. Under message drafts click “Schedule” and then “Edit” next to “Do you want to share this message?”
Make sure your Newsletter Hub is enabled, then you’ll see a link directly to the Hub.
2. Under List Settings
Click on “List Options” -> “List Settings” -> “Personalize Your List” and you’ll see your Newsletter Hub link under Subscriber Pages.
Note that you can also choose whether or not to allow sign ups on your Newsletter Hub page.
3. Under sent broadcast emails
Click on any previously-sent broadcast email where you can access stats on the email. As long as Newsletter Hub is enabled, the link will show at the bottom.
How do I choose which emails are included?
You can opt to have your broadcast added to the Newsletter Hub when you send it, under Settings -> Do you want to share this message?
Any time after it’s sent, you can also click on the sent broadcast and toggle on/off under Newsletter Hub Links to include or not include the email in your Newsletter Hub.
There are a few reasons why you might not want to include certain emails in your Newsletter Hub feed.
You offered a temporary sale. You wouldn’t want people in December seeing a sale or promotion you ran in September — they might get confused or ask for the same promotion when it’s not running.
Your email is about a product or service update. If the information is not useful long term — like a day-of notification of something — no need to include it in your Newsletter Hub where it may be seen weeks or months later.
You sent out news that’s no longer true. A Newsletter Hub, like a blog, should tell the truth when someone is reading it. If your email includes dated news, you may want to keep it out of the Hub.
And here are three types of emails you should definitely include in your Newsletter Hub!
Your regular newsletter. If this is the content your subscribers should expect from you on a regular basis, make sure they can see it
Product or service descriptions. Especially if they link to sales pages, a product sales email allows you to show off what you sell long term — not just in one email sent to your current subscribers.
Event notifications. This may seem weird, but if you host, sponsor, or attend an event, you should include it, even though it’s dated. It shows that you are publicly available, and your readers may watch for you at the next event.
Take a look at your Newsletter Hub now, and think about what your subscribers — current and future — would want to see long term. And what you’d want them to see. You can fully curate your Newsletter Hub for your needs, and your audience.
What’s coming next?
This is only the beginning of our plans for the Newsletter Hub! We have a lot of thoughts about what to include, but we’d like your take.
Want to see images? Like buttons? Comment sections? Something else? Let us know by filling out the feedback form below.
Start an AWeber account today
Want your very own Newsletter Hub? You can have one for free when you sign up for an AWeber account today. Don’t forget — you need to send out a message to have it show up in your Hub.
Keep reading:Any Form You Can Imagine, AI Signup Form Builder Can Create itDraft, Send, and Analyze. All From ChatGPT