7 Steps to Create and Measure Winning Facebook Ads
By Rebecca Pollard June 30, 2016
Searching for a tactic to send more traffic to your website sign up forms and grow your email marketing audience?
Facebook’s a good option. With 1.65 billion monthly users, Facebook gives you a huge audience, who you can connect with, drive to your site and get to join your subscriber list.
At AWeber, Facebook ads are one of our highest-performing Facebook strategies. When done correctly, Facebook ads are budget friendly, bring in qualified leads and reach a large audience, unlike unpaid Facebook posts (algorithm changes are a pain).
In this post, I’ll walk you through seven simple steps to create an effective Facebook ad. You’ll learn how to quickly build Facebook ads that fit your budget, send engaged traffic to your website and grow your email list and your business.
Why should you use Facebook ads for list growth? Because converting Facebook users into email subscribers is better for your budget. Email marketing is more cost-effective than promoting Facebook posts over and over, not to mention it results in better engagement.
So let’s get started.
Step 1: Choose your objective
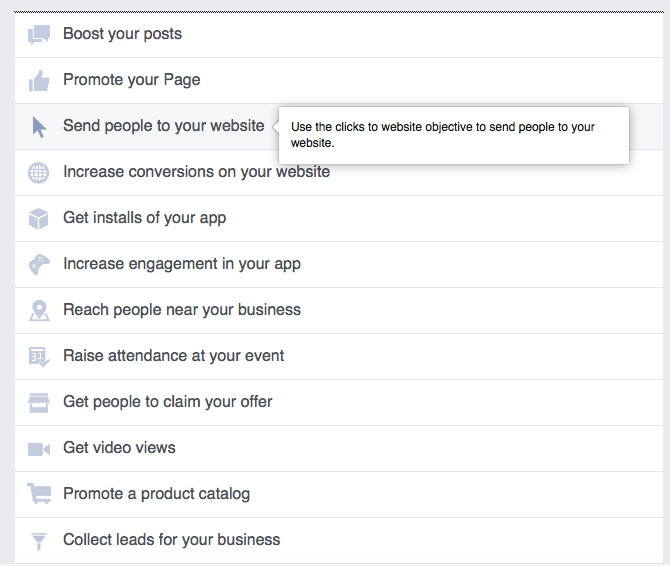
The first step to create a Facebook ad is to choose your objective, or the goal of your ad. You can choose to promote your Facebook business page, boost individual posts on your page, drive traffic to your website and much more.
For the purpose of this blog post, we’ll focus on driving traffic to your website.
To set up this goal in Facebook, choose “Send people to your website” and select the web page to which you’d like to send them.
Bonus tip: We’ve found that Facebook ads are best for top of the funnel and mid funnel strategies. Start by driving traffic to your website or blog with Facebook ads and use lead magnets and retargeting to convert that traffic.
Step 2: Create target audience segments
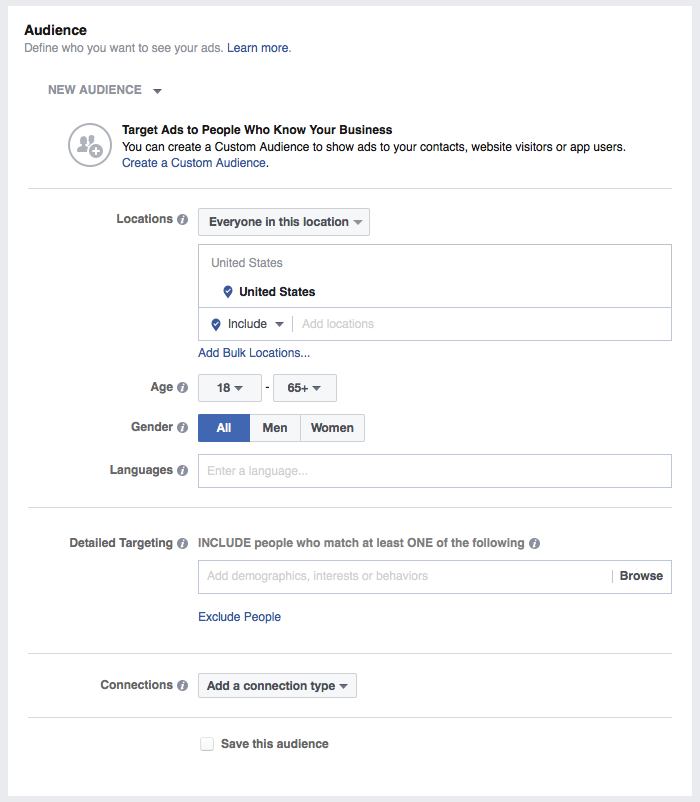
After choosing your objective, Facebook will ask you to select a target audience. Selecting a target audience helps you reach the right people: those who are interested in your product or service and likely to buy.
Facebook is a powerful platform for advertising because you can target your ads to a very specific audience by selecting the location, age, gender, language and interests of those who will see your ad.
But how do you choose the right audience? You can use Digital Marketer’s Customer Avatar Worksheet to map out the traits of your target audience.
Once you know who your target audience is, you’ll use that information to build audience segments for your ads. By doing this, you can find out what kind of targeting results in the best ad performance.
Facebook also allows you to build and save audiences for future use, saving you time when running multiple ads to the same audience.
Let’s use a fictitious example of how to identify and build a target audience:
Samantha is a personal trainer. She offers in-home training sessions about exercise, stress relief and healthy eating. She’s also created her own guide: “How to Get Fit in Just 20 Minutes a Day with No Equipment.”
Let’s see how Samantha would break down her audience:
Audience traits: Samantha’s target audience is women, age 25-45, with a household income over $100,000 a year, that live in the Atlanta, Georgia region.
Audience interests: Samantha also knows that her audience watches Real Housewives of Atlanta, reads magazines like Atlanta Magazine, Best Self, and Modern Luxury Interiors, and shops at Ann Taylor, New York and Company and Macy’s.
Here are two audiences Samantha might build for her Facebook ads:
Audience #1: women age 25-45 with a household income over $100,000 a year, located in the Atlanta, Georgia region who watch Real Housewives of Atlanta
Audience #2: women age 25-45 with a household income over $100,000 a year, located in the Atlanta, Georgia region who shop at Ann Taylor
Bonus tip: Need more help creating your customer profiles? I use these two resources to create mine:
- Convince and Convert: How To Create Customer Profiles
- Quick Sprout: How To Define Your Target Audience
Step 3: Set your budget
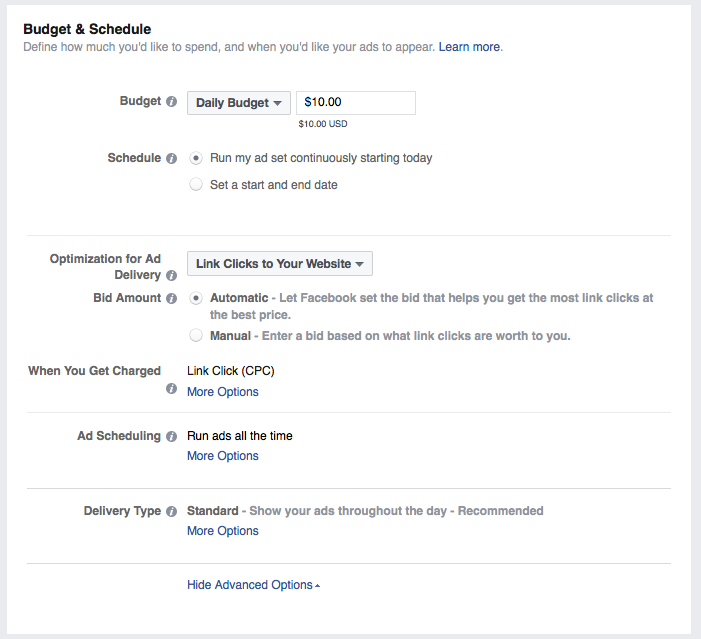
When you’re just starting out, spending your hard-earned money on Facebook ads can be scary. But it doesn’t need to be. By establishing an overall budget up front and setting clear and reachable goals, you can keep your costs where you need them to be.
For your first campaign, start with a small daily budget for each ad group, let’s say $10 (you can always increase it once you’ve launched). Facebook defaults to “automatic” bidding, but I always recommend switching to “manual” so that you have more control over what you are spending.
When you select manual, Facebook will give you a suggested bid based on the audience and how many other people are bidding for ads to that audience. Go lower! If Facebook suggests a one to three dollar bid, bid fifty cents. You can always increase your bid, but you can’t get money back that you’ve already spent – so play it safe.
If your ad isn’t getting impressions (or views), raise your bid gradually. If you bid fifty cents, and you’re not getting any reach, raise your bid to sixty cents or sixty five cents. Often, little changes make a big difference in your results.
Bonus tip: Mobile cost per click (CPC) is typically 50 percent lower than desktop CPC. Use this to your advantage, but make sure to rely on your conversion data. You may get a lower CPC and higher number of clicks on mobile, but at the same time, your mobile audience might not be converting.
Step 4: Create your ad
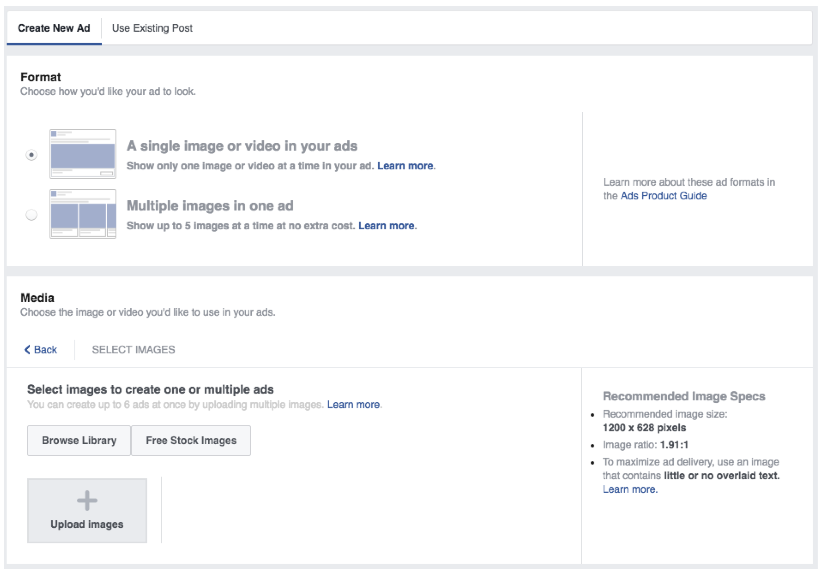
Creating your Facebook ads is easy. To keep it simple, start by using a single image or video in your ad. As you get more advanced, you can test multiple images or video.
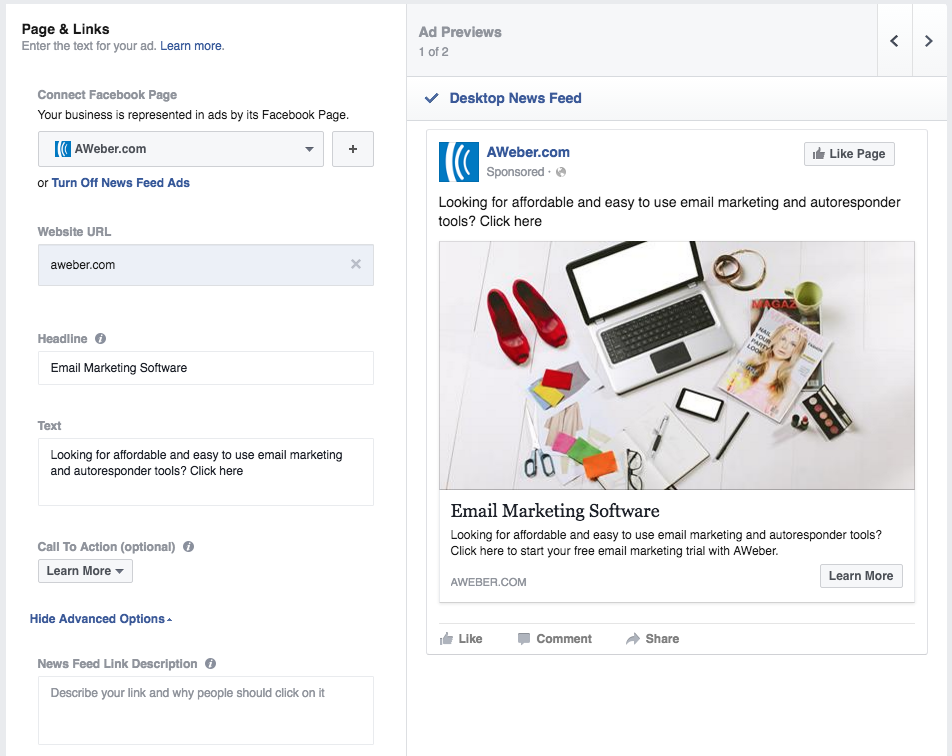
Once you’ve selected your images, they’ll automatically show up in a preview. Select your Facebook page in the Connect Facebook Page section, and then paste the URL to which you want to drive traffic.
Once you paste your link, Facebook will automatically populate copy from your web page for the headline, text and description. I recommend rewriting this copy so it resonates with your ad audience instead.
Bonus tip: If you don’t have images to use for your ad, Facebook provides free stock images. You can also find free stock images on Unsplash and Pexels.
Step 5: Optimize your ad
People always want to know what types of images and copy work best on Facebook. The short answer is: it depends. Every audience responds differently. The best way to find out what works best is to test variations.
Since your image and headline have the biggest impact in driving clicks, I recommend starting your tests there. Create two versions of your ad, with one slight difference between the ads.
For example, for your first test, use two different images for your two ad variations. See which ad wins, pause the losing ad (i.e., the ad that is too costly or that isn’t converting as well), and then test again with a different ad and different variation.
At AWeber, we consistently test up to five images and at least two copy variations for each campaign that we launch. After 24 hours, we evaluate which ones are performing the best, and turn off the ads that are under-performing.
In one of our recent tests, we discovered that light-colored images perform better for certain audiences, while dark-colored images perform better for other audiences.
Within a Facebook ad campaign, we had two ad groups with the exact same copy but different images: one dark and one light. The lighter image outperformed the darker image. As a result, we turned off the ad group with the darker image, which meant more conversions at a lower cost.
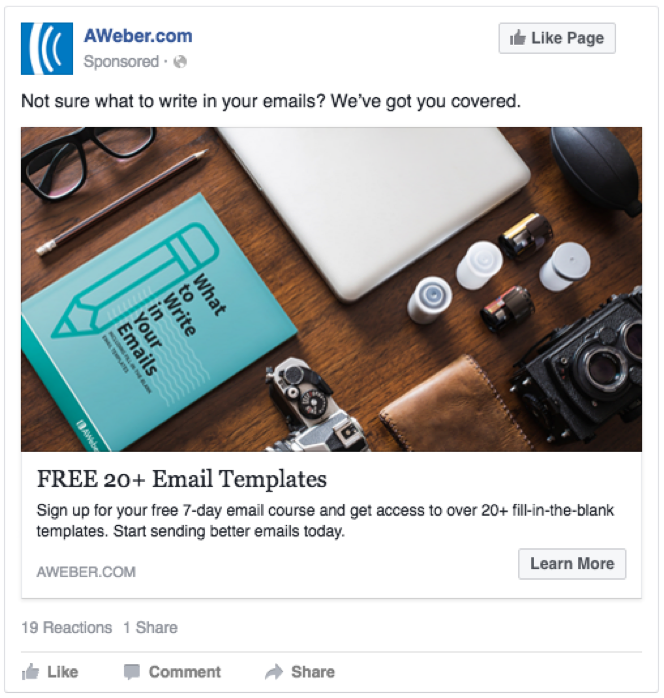
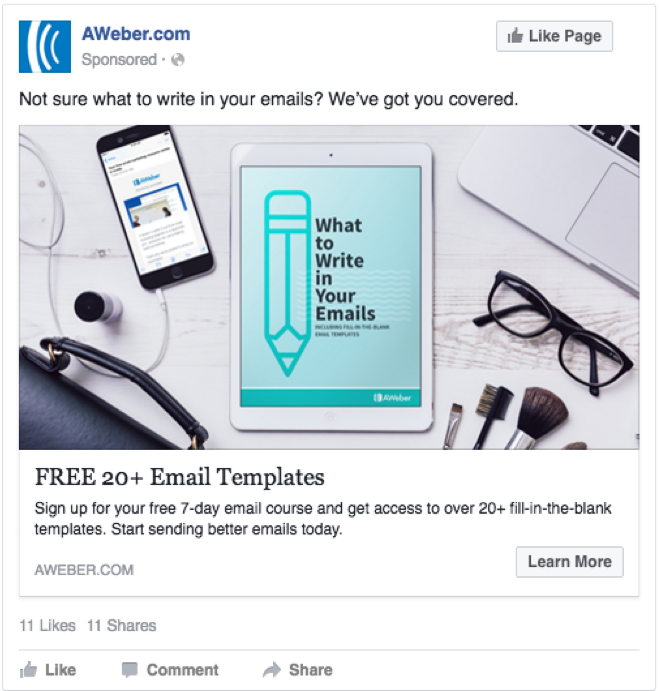
Bonus tip: The higher your relevancy score, the more reach you’ll get on your ads. Use that as a measurement for evaluating whether your ads are relevant for your audience. But remember, Facebook doesn’t always understand your goals, so look at all of the data carefully before making a decision to turn an ad on or off.
Step 6: Track your conversions
To measure the success of your Facebook ads, you need to be able to track your conversions. Conversion tracking in Facebook can be complex, but there are simple methods to get started.
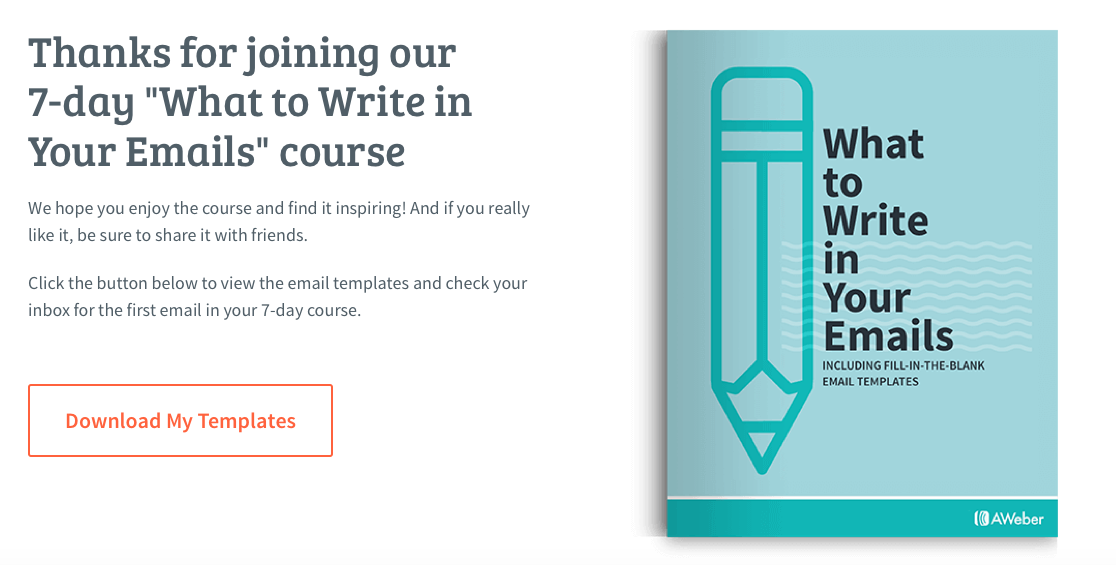
My best advice is to always have a “thank you” page after any conversion takes place. (You can create “thank you” pages in minutes with a tool like Leadpages.) Use the URL of the “thank you” page to easily create conversion events (i.e., when someone completes the action you are trying to achieve). Here’s an example of a “thank you” page we used during a Facebook ad campaign for our What to Write course:
Facebook recently released a new pixel that makes it easy to track performance across your website, including conversions, and it even allows you to easily build retargeting audiences. Their 4-step process helps you:
- Create the pixel for your website
- Install it on your website
- Add your standard conversion events
- Use it for optimization and tracking with ads
Bonus tip: Facebook conversion tracking will allow you to see real-time performance of your ads. However it’s always good to use a second source to compare data. I recommend using a free analytics tool, like Google Analytics, to track the performance of all your marketing channels.
Step 7: Analyze your data
Once you’re up and running, analyzing your data is essential. You’ll want to watch carefully to see which images and copy get the highest click-through rates (CTR), and which audiences lead to the highest conversions for your campaigns.
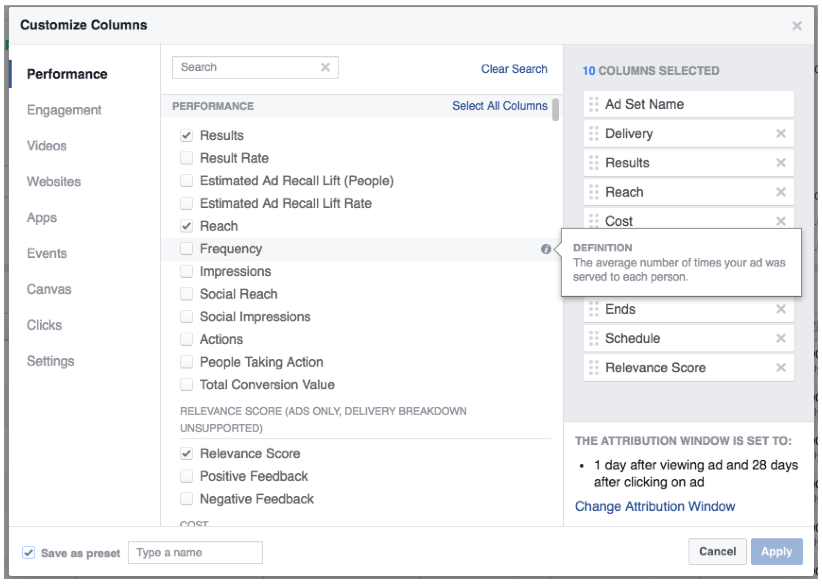
Bonus Tip: Facebook allows you to create Customized Columns in the reporting dashboard that can then be saved as a preset. Use this as an easy way to set up exactly what metrics you want to look at based on your conversions. Save it as a preset to easily access your report every time you log in.
Build your first Facebook ad today
It’s time to create your first Facebook ad, drive traffic to your website and grow your email list! Do you have any questions about Facebook ads? Ask them in the comments section below.
Not an AWeber customer yet? Get 30-days for free.
 87% off ends soon!