How to Add Email Marketing to Your Lovable Website
Sean Tinney
Built a stunning website with Lovable’s AI platform? Adding email marketing is the fastest way to turn those visitors into subscribers.
Why Add Email Marketing to Your Lovable Website
Email gives you something social media never will: direct access to your audience. Consumers who purchase products through email spend 138% more than those who don’t receive email offers, and email marketing persuades the purchasing decisions of nearly 6 out of every 10 subscribers.
While Lovable makes it easy to build professional websites through AI-powered conversations, adding email marketing to your Lovable site transforms it from a static showcase into an active growth engine. You’ll capture leads 24/7, build relationships through automated follow-ups, and create a direct communication channel that no algorithm can take away.
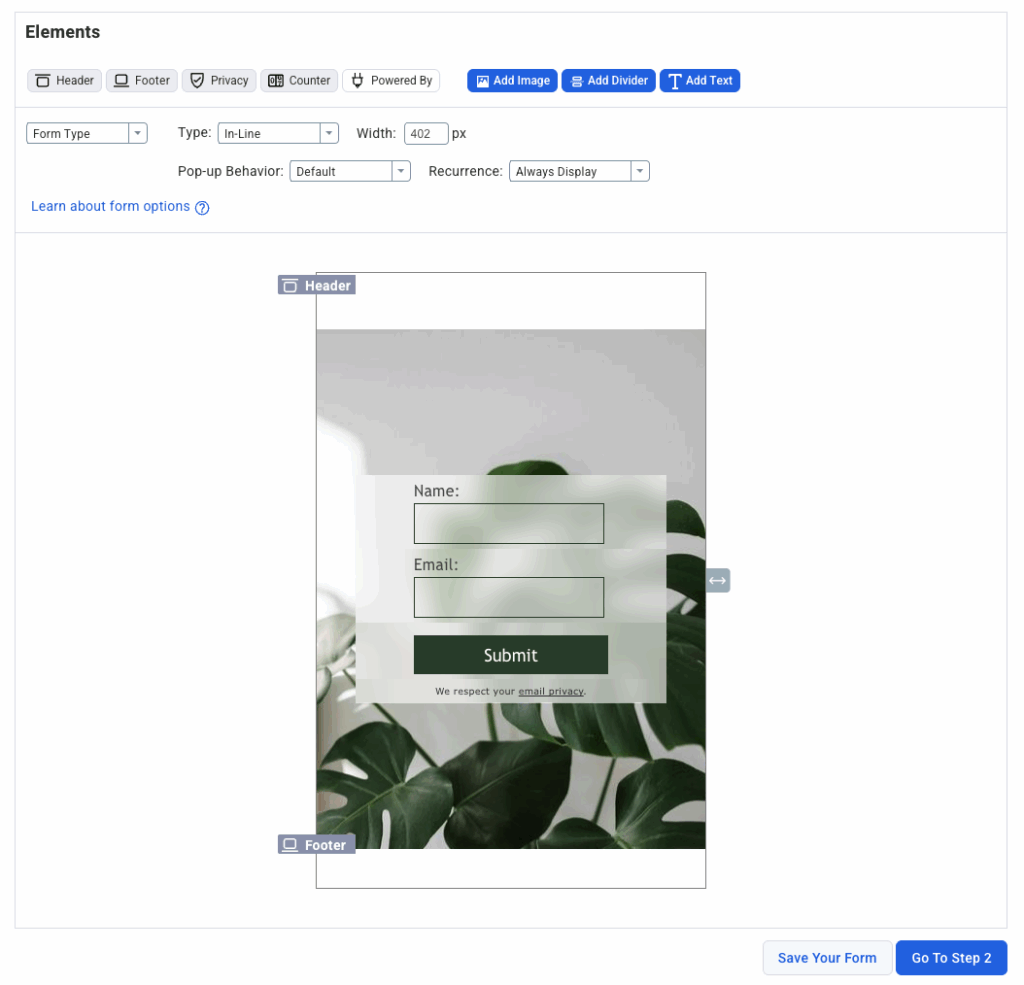
Start by designing your signup form in your email marketing platform. We offer several form types including inline, pop-up, and slide-in options.
Keep your form simple—asking for just a name and email address reduces friction and increases signups.
Choose a form template that matches your brand, customize the colors and copy, and make sure your call-to-action clearly communicates value.
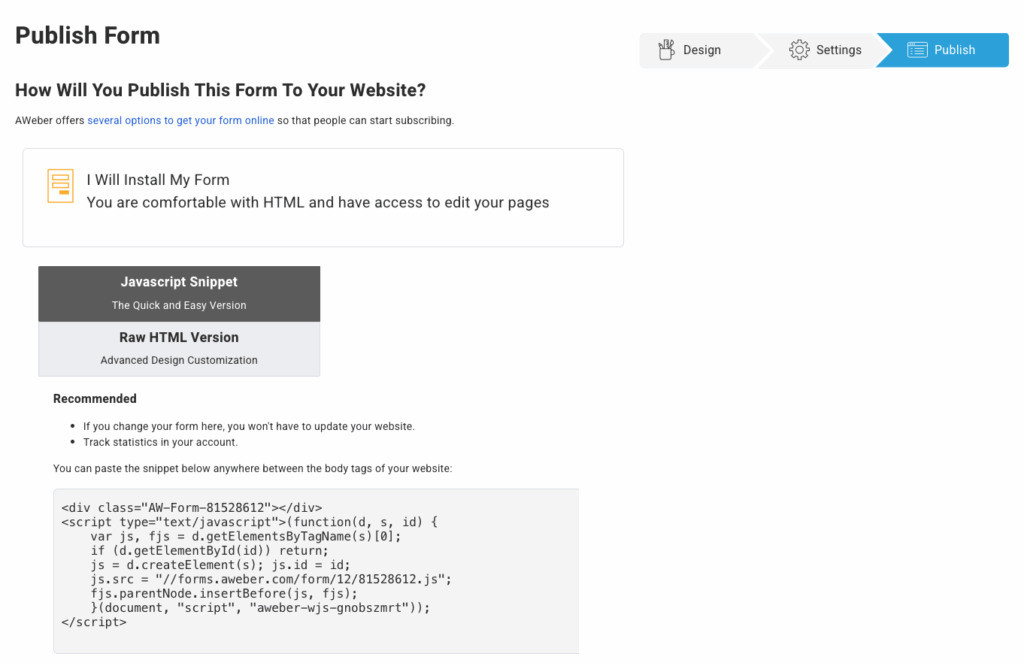
Step 2 – Get Your Embed Code
Once your form looks perfect, grab the embed code:
Click the “Publish” or “Embed” button in your form builder
Select “JavaScript” or “HTML” embed option
Copy the complete code snippet—you’ll need the entire thing
Our form builder automatically generates mobile-responsive code, so your form will look great on any device without additional work.
Step 3 – Add the Form to Your Lovable Site
Here’s where Lovable’s conversational AI really shines. Open your Lovable project and simply tell it what you want:
“Add my AWeber signup form below the hero section” and paste in the embed code you copied.
Lovable will integrate the form exactly where you specified. If you don’t see it immediately, just clarify: “Make sure to add the snippet exactly as provided.” The AI will correct it right away.
Watch this quick video showing both the basic embed method and an advanced custom form approach:
How to Add AWeber Sign-Up Forms to Lovable AI Websites
Step 4 – Test Your Form
Before you celebrate, make sure everything works:
Submit a test email using your own address
Check your email to confirm you received a confirmation message (if you have double opt-in enabled)
Verify in your dashboard that the test subscriber appeared in your list
Test on mobile to ensure the form displays correctly on smaller screens
Troubleshooting Common Issues
Form not displaying? Double-check that Lovable added the complete embed code without modifications. Sometimes AI tools accidentally truncate long snippets—ask Lovable to verify it included everything.
Styling looks off? Lovable’s default styles might conflict with your form’s CSS. Tell Lovable: “Make sure the form styling isn’t being overridden by the site’s CSS.” You can also adjust form colors and fonts in your email platform’s form builder to better match your site.
Subscribers not appearing? Confirm you’re looking at the correct email list in your dashboard. If you have multiple lists, verify the form is connected to the right one.
Mobile display problems? Most modern signup forms are automatically responsive, but if you notice issues, tell Lovable to add the form within a mobile-friendly container or adjust the maximum width.
Best Practices
Place forms strategically: The most effective locations are your homepage (below the hero section), blog posts (at the end of articles), and your footer (visible on every page). Consider adding multiple forms throughout your site—different placements capture different visitor intents.
Offer clear value: Tell visitors exactly what they’ll get. For example: “Join 5,000+ entrepreneurs receiving weekly growth tips” beats “Sign up for our newsletter” every time.
Keep it simple: Limit form fields to essentials. Each additional field you add can reduce conversions by up to 50%.
Test different approaches: Once your basic form is working, experiment with timing (instant vs. delayed pop-ups), placement (top vs. bottom), and messaging. Our A/B testing capabilities make it easy to find what works best for your audience.
Follow up immediately: Set up an automated welcome email that delivers on your signup promise and sets expectations for future emails.
FAQs
Can I customize the form design in Lovable? Yes! You can either customize the form in your email platform before embedding it, or ask Lovable to adjust the styling after it’s added. Lovable can modify colors, fonts, spacing, and positioning through simple conversational requests.
Do I need coding knowledge? Absolutely not. Both Lovable and AWeber are designed for non-technical users. You can build complete email capture systems without writing a single line of code.
What if I want more advanced form behaviors? Lovable can create sophisticated behaviors conversationally. Want a slide-in form that appears after 5 seconds? Just ask. Need it to trigger only when someone scrolls 50% down the page? Tell Lovable, and it’ll handle the implementation.
Will this slow down my website? Modern email signup forms are lightweight and asynchronous, meaning they load separately from your main content. Your site speed should remain unaffected.
Start Growing Your List Today
Ready to start growing your email list? Get started with AWeber and integrate your first signup form with Lovable today. Our drag-and-drop form builder and AI-powered tools make it simple to create professional email marketing systems—even if you’ve never sent a marketing email before.
Built a stunning website with Lovable’s AI platform? Adding email marketing is the fastest way to turn those visitors into subscribers.

Why Add Email Marketing to Your Lovable Website

Email gives you something social media never will: direct access to your audience. Consumers who purchase products through email spend 138% more than those who don’t receive email offers, and email marketing persuades the purchasing decisions of nearly 6 out of every 10 subscribers.

While Lovable makes it easy to build professional websites through AI-powered conversations, adding email marketing to your Lovable site transforms it from a static showcase into an active growth engine. You’ll capture leads 24/7, build relationships through automated follow-ups, and create a direct communication channel that no algorithm can take away.

Step-by-Step Integration Guide

Here’s how to add email signup forms to your Lovable site in just a few minutes—no coding required.

Step 1 – Create Your Form in AWeber

Start by designing your signup form in your email marketing platform. We offer several form types including inline, pop-up, and slide-in options.

Keep your form simple—asking for just a name and email address reduces friction and increases signups.

Choose a form template that matches your brand, customize the colors and copy, and make sure your call-to-action clearly communicates value.

Step 2 – Get Your Embed Code

Once your form looks perfect, grab the embed code:

Click the “Publish” or “Embed” button in your form builder

Select “JavaScript” or “HTML” embed option

Copy the complete code snippet—you’ll need the entire thing

Our form builder automatically generates mobile-responsive code, so your form will look great on any device without additional work.

Step 3 – Add the Form to Your Lovable Site

Here’s where Lovable’s conversational AI really shines. Open your Lovable project and simply tell it what you want:

“Add my AWeber signup form below the hero section” and paste in the embed code you copied.

Lovable will integrate the form exactly where you specified. If you don’t see it immediately, just clarify: “Make sure to add the snippet exactly as provided.” The AI will correct it right away.

Watch this quick video showing both the basic embed method and an advanced custom form approach:


  How to Add AWeber Sign-Up Forms to Lovable AI Websites


Step 4 – Test Your Form

Before you celebrate, make sure everything works:

Submit a test email using your own address

Check your email to confirm you received a confirmation message (if you have double opt-in enabled)

Verify in your dashboard that the test subscriber appeared in your list

Test on mobile to ensure the form displays correctly on smaller screens

Troubleshooting Common Issues

Form not displaying? Double-check that Lovable added the complete embed code without modifications. Sometimes AI tools accidentally truncate long snippets—ask Lovable to verify it included everything.

Styling looks off? Lovable’s default styles might conflict with your form’s CSS. Tell Lovable: “Make sure the form styling isn’t being overridden by the site’s CSS.” You can also adjust form colors and fonts in your email platform’s form builder to better match your site.

Subscribers not appearing? Confirm you’re looking at the correct email list in your dashboard. If you have multiple lists, verify the form is connected to the right one.

Mobile display problems? Most modern signup forms are automatically responsive, but if you notice issues, tell Lovable to add the form within a mobile-friendly container or adjust the maximum width.

Best Practices

Place forms strategically: The most effective locations are your homepage (below the hero section), blog posts (at the end of articles), and your footer (visible on every page). Consider adding multiple forms throughout your site—different placements capture different visitor intents.

Offer clear value: Tell visitors exactly what they’ll get.  For example: “Join 5,000+ entrepreneurs receiving weekly growth tips” beats “Sign up for our newsletter” every time.

Keep it simple: Limit form fields to essentials. Each additional field you add can reduce conversions by up to 50%.

Test different approaches: Once your basic form is working, experiment with timing (instant vs. delayed pop-ups), placement (top vs. bottom), and messaging. Our A/B testing capabilities make it easy to find what works best for your audience.

Follow up immediately: Set up an automated welcome email that delivers on your signup promise and sets expectations for future emails.

FAQs

Can I customize the form design in Lovable? Yes! You can either customize the form in your email platform before embedding it, or ask Lovable to adjust the styling after it’s added. Lovable can modify colors, fonts, spacing, and positioning through simple conversational requests.

Do I need coding knowledge? Absolutely not. Both Lovable and AWeber are designed for non-technical users. You can build complete email capture systems without writing a single line of code.

What if I want more advanced form behaviors? Lovable can create sophisticated behaviors conversationally. Want a slide-in form that appears after 5 seconds? Just ask. Need it to trigger only when someone scrolls 50% down the page? Tell Lovable, and it’ll handle the implementation.

Will this slow down my website? Modern email signup forms are lightweight and asynchronous, meaning they load separately from your main content. Your site speed should remain unaffected.

Start Growing Your List Today

Ready to start growing your email list? Get started with AWeber and integrate your first signup form with Lovable today. Our drag-and-drop form builder and AI-powered tools make it simple to create professional email marketing systems—even if you’ve never sent a marketing email before.
Keep reading:Landing page vs website: which one does your business need?Social proof examples: How to use them in your email marketing