We Wanted to Know If Subscribers Liked Our Email Content. Here’s How We Got 1,600+ People to Tell Us.
By Chris Vasquez November 17, 2017
If you’re looking for the 5 simple steps to start using the sentiment widget for yourself, click here.
Every time we sent an email, we ended up with lots of data. Open and click rates from hundreds of emails delivered to hundreds of thousands of subscribers.
But all this data didn’t tend to give us clear, actionable steps to improve our emails. I just couldn’t figure out the why behind the numbers. More often than not, I found myself guessing why subscribers might have responded negatively or positively to any given email. I had no way to tell how they actually felt.
And while we often surveyed our audience to get more detailed, specific information from them, this didn’t help us determine how subscribers felt about each email we sent. It only gave us an idea of how they felt at the time we surveyed them.
It was frustrating. And I felt stuck.
So I sat down to contemplate how we could continuously acquire meaningful insights when an idea hit me: a simple solution to get direct feedback from our subscribers every time we sent an email.
And it worked! In under a year, we got over 1,600 people to give us useful, relevant feedback, which we used to implement huge, positive changes in our email marketing and design.
All we needed was a little widget.
How a little widget worked wonders
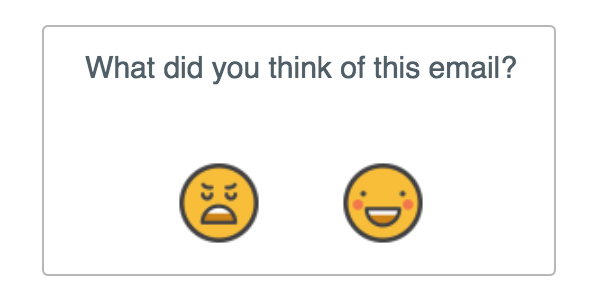
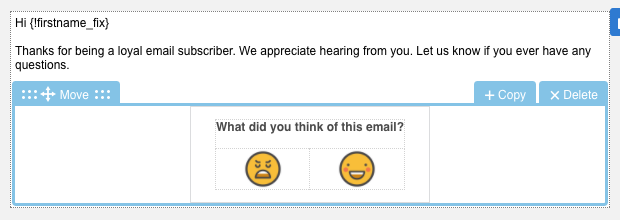
The sentiment widget is a tiny, two-question survey we include at the bottom nearly every email we send. To make giving feedback easy, fast and fun, we built it to resemble the reaction bars on Facebook or in chat apps. With one click, subscribers can give us instant feedback.
To make our subscriber’s choice simple, we focused on only two options – unhappy or happy. We illustrated these choices with two icons – a smiling emoji and a frowning emoji.
When a subscriber clicks one of the icons, we direct them to a one-question SurveyGizmo survey. In this survey, they can offer additional information about why they either liked or disliked the email.
But here’s the key to that additional question:
They don’t have to answer it to share feedback! They can simply click one of the icons and be done. Or, they can provide more detail. It all depends on the person’s preference.
“Short, to the point, yet fun. Liked that it had link as well as button too. Voted for you as well, of course.”
“Check out the templates in your account link doesn’t work”
“I liked the opportunity to pick and choose what I read (wanted to read more about)… I read/watched them all once I got started.”
This little tool delivers huge value. With it, subscribers can share their reaction to any email we send them with minimal effort.
Furthermore, it provides both quantitative feedback (the percentage of people that like our emails vs. the percentage that don’t like them compared to benchmarks) as well as qualitative feedback (how and why our subscribers feel a certain way about an email).
And the best part?
It’s such a simple thing. Anyone can use it in their own email campaigns.
And I’ll show you how.
Use case 1: Gather email-specific feedback.
One of the biggest benefits of the sentiment widget is the ability to measure and respond to reactions from specific emails and specific parts of those emails.
My favorite illustration of this point was the email that I mentioned above, where we sent a message to our customers about our Customer Solutions team winning gold at the Stevie Awards.
The email we sent included a headline, supporting copy, a link to a corresponding blog post and an image of our team. We decided to split test the email to see whether an animated GIF version of the team photo would perform better than a static image.
What we found was incredibly interesting. Without the sentiment widget, we wouldn’t have easily been able to discover it.
The version with the GIF saw significantly increased clicks. Big surprise, right?
What was surprising was that the increase in clicks was completely driven by more users clicking on the happy face in the sentiment widget.
| Static Image | GIF | |
|---|---|---|
| Total Clicks (% of opens) | 3.9% (544) | 4.55% (625) |
| CTA/image Clicks (% of clicks) | 39.15% (213) | 36.16% (226) |
| Happy Icon Clicks (%of clicks) | 51.47% (280) | 60.48% (378) |
“I loved the little animated group photo. I loved you had two different places to click to cast your vote. Nicely done and modeled for us!”
“I love the positive, happy energy that I feel when I see this. —- You guys are definitely one of the best out there for support. Thanks for being a group of individuals that make those of us who aren’t tech savvy very comfortable with the whole process. You guys ROCK………Thank you.”
We’ve re-tested this a number of times in different emails and have seen similar effects.
Why does this matter?
We used this insight as a basis for using a GIF whenever possible in emails where we showcase our team.
Almost every time we do, we receive additional feedback from users that the animations were the tipping point which made them decide to click or engage with the email.

This is my favorite example of how we’ve used the widget to understand things about specific content from our emails. But we’ve also used the feedback to make all sorts of improvements, like:
- Adding category labels to our blog digest to help users better scan the content.
- Fixing mobile rendering issues in obscure email clients.
- Removing customers from prospect lists they were still on because of one off issues.
Before I move on to use case two, I have one caveat about gifs. I don’t recommend using a GIF in every email. Even though I love GIFs, overusing them is never a good thing. So make sure you have solid rationale when you do choose to use GIFs.
Use case 2: Build audiences of fans and detractors.
When we released Click Automations at AWeber, it unlocked a new universe of possibilities for the sentiment widget. We could now automatically create segments based on interactions with the sentiment widget.
This allows us to even further tailor our email communication to subscribers based on how we know they feel about us.
If subscribers are happy with us, we can send them one message. If they’re unhappy, we can send a different one.
Here’s an example about how we’re taking advantage of this functionality:
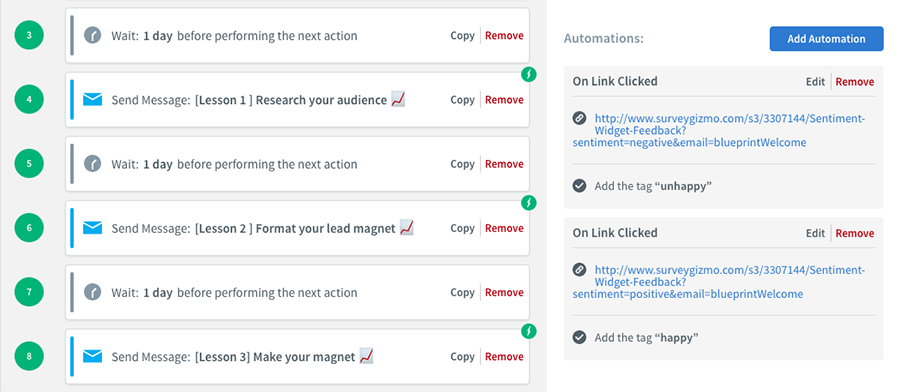
In our Email List Growth Blueprint course, subscribers are delivered an email a day for six days, each focused on a specific lesson in the course.
Every email includes the sentiment widget in the footer. When a user clicks on the positive sentiment widget icon, they are tagged “happy.” When they click on the negative icon, they are tagged “unhappy.”
With that one simple click automation, we now have the ability to speak to our audience (both directly and through automation) in a more relevant and powerful way.
Here’s a couple things we could do with those two tags:
For Happy users
- Add them to a campaign that sends a free additional resource (Think a checklist or template.) to surprise and delight the subscriber. This is also a great opportunity to ask the happy subscriber to share the course, offer a review or try out an additional course or resource.
- Send broadcasts directly to your cohort of happy subscribers when you launch new products asking them to act as beta users or advocates, or just to give early access and make them feel extra special.
For Unhappy users
- Add them to a campaign that sends additional resources (This could be anything from a downloadable to FAQs.) and offers them an opportunity to get in contact with you directly.
- Send broadcasts directly to your cohort of unhappy subscribers giving them opportunities to contact you or offer more feedback. Or, if you think you know why they might be unhappy, present them with a solution.
- If you have captured additional information about why a user was unhappy (through a survey), reach out directly to show care and find solutions.
Pro tip: While the Sentiment Widget is perfect for gathering quick feedback on individual emails, you should still send traditional surveys to gather more detailed feedback on your overall content strategy. At AWeber, we send out long-form surveys to our audience every few months. We also survey them after they utilize one of our courses or products.
Step-by-step instructions for using the Sentiment Widget in your own emails
As mentioned above, the sentiment widget can be used in just about any email, and is ultra-simple to create and add. It just takes five steps.
1. Go to the Sentiment Widget builder.
Step one, check!
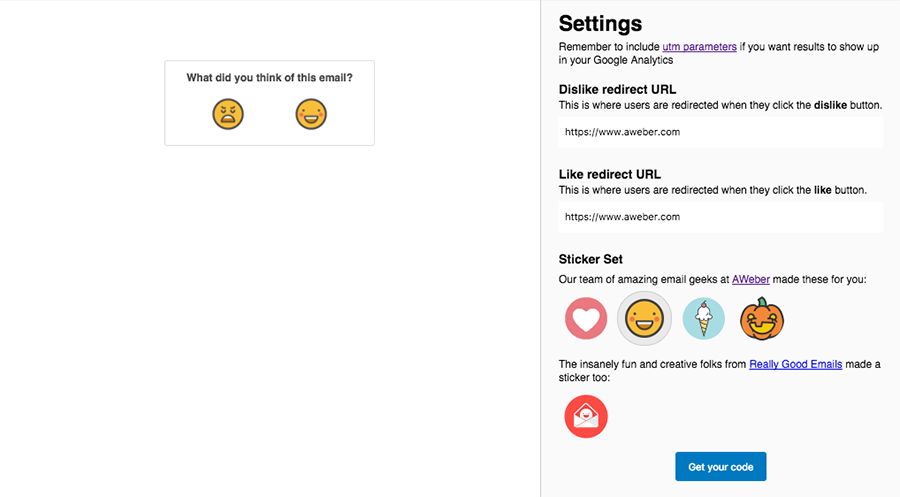
2. Decide what web page you want users to land on when they click an icon.
Because of how the variety of email clients (eg. Gmail, Outlook, etc) differ, we’ve found the most success in tracking each sentiment option as a link. This gives you a ton of freedom to do creative things to guide the experience of a user who engages with the sentiment widget, such as:
- Give them the opportunity to offer additional feedback by sending them to a survey. This is what we do with our sentiment widget. When a user clicks, they’re directed to a single question that asks them for more context on why they either liked or disliked the email.
- Direct users to custom landing pages based on whether they liked or disliked the content. This is a great opportunity to tailor how you talk to your users. If a user just let you know that they liked your content, thank them and ask if they’d be willing to share the email. Or, if they disliked it, why not give them an opportunity to reach out to you directly to work through any issues they might be having.
- For emails about blog content, link to to the comments section for that post in the widget.
Pro Tip: Add UTM parameters to help differentiate your sentiment links.
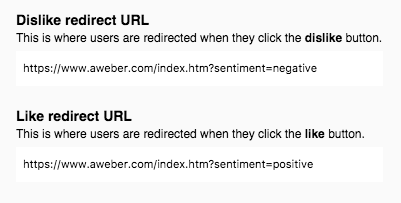
To easily distinguish between positive and negative reactions, we always append UTM parameters to the end of the links we will be using for our sentiment icons. We use “sentiment=positive” and “sentiment=negative”, so our links look like:
https://www.aweber.com/index.htm?sentiment=positive
3. Pick the “sticker” set you want to use.
Here are icon options you have with the sentiment widget:
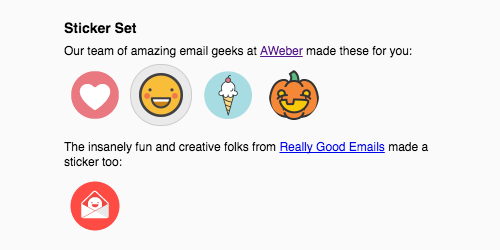
Sticker choice is up to you, but I’m partial to the happy faces.
If you have ideas for new sticker packs, let me know in the comments below!
4. Copy the sentiment widget code snippet.
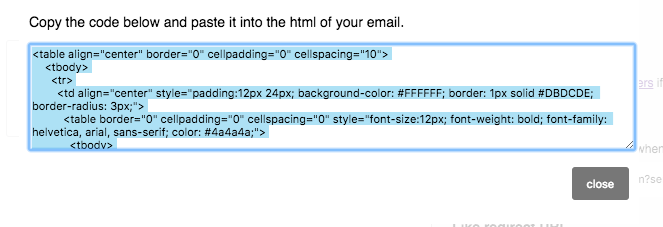
Looking great so far!
5. Paste the code snippet into your email.
If you are using an AWeber drag-and-drop template:
- Drag a paragraph element into your email.
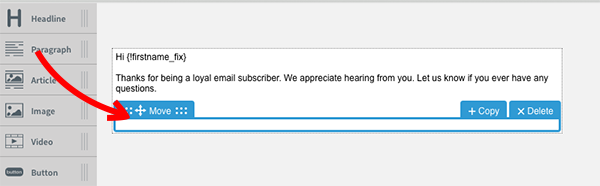
- Select the paragraph element.
- Hit the “Source” button in the menu bar.
- Paste in your code snippet.
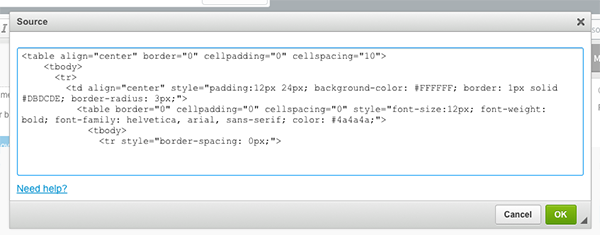
- Hit the “Ok” button.
- Celebrate!
Can I get your feedback?
You now have a working simple sentiment widget in your email. We would love to hear what interesting things you learn, and how you adapt the sentiment widget for your own specific use cases.
If you unearth anything particularly interesting (or just have some fun with this tool) please let us know in the comments below. And don’t hesitate to ask if you have any questions.
Did you like this blog post? Get more content just like it delivered to your inbox when you subscribe to AWeber’s free, weekly email marketing newsletter.
Lee Lo
11/22/2017 7:39 amThank you! Helpful data and information!
Jean
11/22/2017 11:10 amHello,
Thank you for this very interesting article.
I just don’t understand how you trigger a specific message when people click https://www.aweber.com/index.htm?sentiment=positive.
Sincerely,
Jean
Chris Vasquez
11/24/2017 9:38 am@Lee – Thanks so much for the kind words!
@Jean – Sorry it took so long to get a response together, but here’s a screencast I put together that shows how you would use the sentiment widget to segment promoters and detractors in your email (and send an automated campaign to promoters:
https://aweber.wistia.com/medias/bz9fl81rg5
If you have any questions, let me know, I’d be more than happy to answer them. Can’t wait to see what you end up doing.
@Joe – Thanks so much! I’d love to put you in contact with one of our product managers to get your perspective on what you’re looking for from split testing.